Update Tab
One of the features of the Support Tool is being able to use it to update JNIORs with software. This is done with update projects, which load files and configuration settings onto the JNIOR in a step-by-step order. This post will go over how to Open, Create/Edit, Close, and Publish/Cancel update projects to the JNIOR.
Opening an Update Project⚓︎
In order to update your JNIOR with an update project, you first need to have an update project downloaded to use. For this example, we’ll use the JNIOR Core update project, which will update your JNIOR with the latest JANOS OS available onto your JNIOR. Here is a download for the update project. NOTE: Update Projects are zip files, do not unzip it once its downloaded.
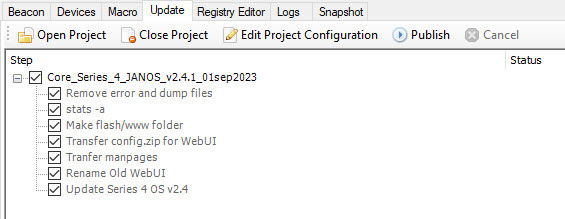
Once you have downloaded this update project, we then need to open it in the Support Tool. You do this by clicking the Open Project button in the Update tab of the Support Tool. This will open your computers file explorer, and you’ll navigate to the update project that you just downloaded. Select it and hit open in the file explorer, and you should now see the update project and its steps displayed in the JNIOR Support Tool Update tab. This means you’ve successfully opened an update project.
Creating/Editing an Update Project⚓︎
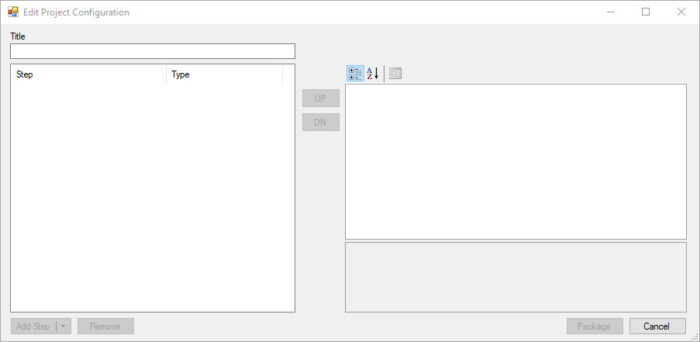
While our website has tons of update projects for different applications already made, you may want to create your own or edit one that already exists. To create a new update project, go to the Update tab of the support tool and select Edit Project Configuration while no update project is open in the Update tab. Once selected, you’ll now see a new window open for editing/creating projects. To create a new project, you have to give it a name in the Title field before you can begin adding steps. Once a title is given, you can steps using the Add Step button at the bottom left. Steps in an update project are executed from top to bottom. Selecting a step and clicking the UP or DN buttons shifts that step up or down in the execution order. When you are done, you can select the Package button to generate your update project.
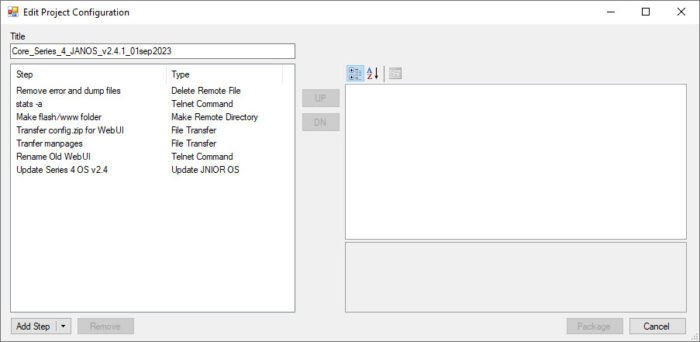
To edit an existing update project, you open it in the Support Tool, and then select the Edit Project Configuration button. Once selected, you’ll now the new window open for editing/creating projects, but this time with all the steps that are currently inside the opened update project.
Update Project Steps⚓︎
Update Projects can perform a multitude of actions on a JNIOR. The following are the available steps that can be added for an update project:
- Registry Key
- Update Registry
- Delete File
- Make Remote Directory
- Reboot
- Load Application
- Transfer File
- Clean Up
- Preserve Files
- Restore Files
- Telnet Command
- Transfer Zip
- Update Series 3 OS
- Update Series 4 OS
- Publishing an Update Project
Once an update project has been opened or created, it can now be loaded on to a JNIOR by publishing it. While the update project is open in the support tool, you’ll click on the Publish button. This will open a new dialog box to select which JNIORs you want to apply your update project to. You can select as many JNIORs as are available in the Beacon tab to publish to. The update project will publish to whichever JNIOR’s you select the checkbox next to. Once you have selected the JNIORs you want to publish to, hit OK. You’ll then see the Support Tool begin to follow the steps inside the update project for each JNIOR selected.
Cancelling an Update Project⚓︎
While an update project is being published to, you can cancel it if needed. While an update project is publishing, select the Cancel button to stop the update project from being applied to JNIORs.