When to Use Cinema⚓︎
When setting up a connection from a Cinema Server to a JNIOR, there are multiple ways to create that connection. While the Cinema.jar application is designed for this, and offers lots of customization from implementing macros, simpiler options might be all you need. This post will go through those different options, and will help you determine the connection that benefits you the most.
JNIOR Protocol⚓︎
- Advantage: It requires less time to setup, as the JNIOR protocol is listening by default, only needing the Cinema Server to be configured to connect to the JNIOR protocol.
- Disadvantage: Commands are limited to whatever the Cinema Server’s built-in library provides. Available commands vary between Cinema Servers. Ex. Cinema Server might have commands for I/O control but no commands for executing macros made from the JNIOR Support Tool or JNIOR Supporter.
The JNIOR Protocol is an OS defined binary protocol the JNIOR listens on. A built-in library means that the device already has pre-built commands that you can use to send to a JNIOR versus having to create the commands yourself. This connection uses both of these and should make connecting to a JNIOR much easier.
What makes using the JNIOR Protocol appealing is that most commonly used cinema servers have the JNIOR as a pre-defined device that you can setup. Once you do, the library they have allows you to just select commands from a list to then control the JNIOR's I/O.
When defining the JNIOR device configuration in your cinema server, it will typically auto-populate the device with a username and password (‘jnior’, ‘jnior’), and the port number (9200 which is the default port number for the JNIOR protocol). The information missing that will need to be entered is the IP address of your JNIOR. With the IP address entered, the information required to successfully create a JNIOR device should be done. Pre-defined commands for controlling the JNIOR can then be selected using that JNIOR device, such as a relay output pulse or macro execution. These commands will be already be created by the built in library and just need to be selected to be used.
If both the Cinema Server and the JNIOR are configured as stated above and the connection doesn’t appear established when trying to send the JNIOR commands, you may need to reboot both devices for your settings to take effect.
Modbus Protocol⚓︎
Some Cinema Servers can communicate with the JNIOR the same way as the JNIOR Protocol does, but using the Modbus Protocol. This requires the ModbusServer application on the the JNIOR to be running.
ModbusServer is an application on the JNIOR that allows a connection to the JNIOR using the Modbus protocol. If a Cinema Server doesn’t use the Modbus protocol, it shouldn’t use this type of connection. This application comes pre-installed on the JNIOR, and needs to be enabled to run on boot. To get the ModbusServer application running on your JNIOR you’ll need to enable it by going to the Applications section of the Configuration Tab of the JNIOR Web Pages. You’ll go to the ModbusServer application and check the checkbox next to it. Once you’ve done that, you’ll need to reboot the JNIOR to get the application to start running.
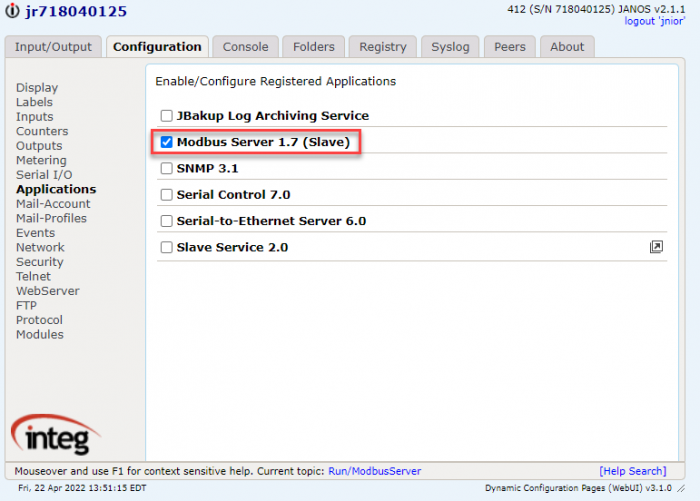
When defining the JNIOR device configuration in your cinema server, this would be set up the same way the JNIOR Protocol, but use the port numbert 502 instead of 9200.
Cinema.jar Application⚓︎
- Advantage: Execution of macros grants more functionality then what might be available from other connections that can be created.
- Disadvantage: Requires more setup compared to other connections that can be made between a Cinema Server and JNIOR.
Another way to connect between a Cinema Server and the JNIOR is the Cinema application. This connection can be done via TCP or Serially. To setup this type of connection we first need to update the JNIOR with the Cinema application. Once Cinema has been installed on your JNIOR, you’ll then need to configure it to connect on a selected port. To do this you need to access the registry of the JNIOR, which can be done via command line or through the JNIOR’s Web Page (Java Applets for Series 3 JNIOR). You’ll need to edit the registry of the Cinema application to properly handle a TCP or Serial connection. Once the Cinema application’s TCP port/serial settings are entered, the macro and device files will need to be created using the support tool. Macro and device files tell the JNIOR what actions to perform when they receive a specified command sent to the Cinema application. How to create macros can be viewed in a post here.
After you have created macros and published them to your JNIOR, you will need to create a device on the Cinema Server’s interface. Make sure that if you are using a serial connection that you are creating a serial device, or if its an Ethernet connection that its a TCP device. You’ll then enter the same connection settings for that device that you have for the Cinema application on the JNIOR. (For example, if you set the Cinema application to listen on 9600, set the Ethernet device you are creating on the Cinema Server to 9600 as well.)
Example Commands⚓︎
Macro Commands
-
run Test\r\n - activates a macro uploaded to the JNIOR called 'Test'
-
run Macro\r\n - activates a macro uploaded to the JNIOR called 'Macro'
ASCII Commands
-
::C1 - Close relay output 1
-
::O234 - Open relays 2, 3 and 4
-
::C* - Close all relay outputs
-
::O+2 - Open relay 10
-
::C1p=1000 - Pulse relay 1 closed for 1 second
With this you should be able to send commands from the Cinema Server to the JNIOR using the Cinema Application.
If both the Cinema Server and the JNIOR are configured as stated above and the connection doesn’t appear established when trying to send the JNIOR commands, you may need to reboot both devices for your settings to take effect.
Serial Control⚓︎
- Advantage: It is a lightweight application and won’t use as much processing power as other applications.
- Disadvantage: Can only control the JNIORs I/O.
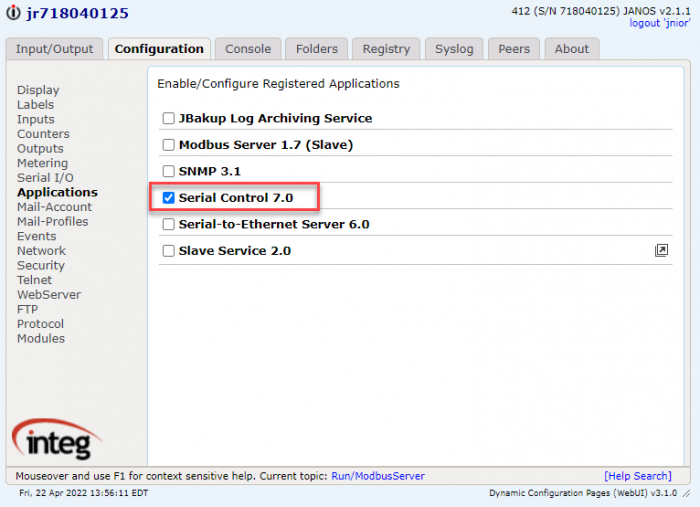
This connection can also be done via TCP or Serially. Every JNIOR comes with bundled software already installed on it, and Serial Control is one of those applications. However, its not set to run so the application doesn’t start when the JNIOR is booted up. To get Serial Control running on your JNIOR you’ll need to enabled it by going to the Applications section of the Configuration Tab of the JNIOR Web Pages. You’ll go to the Serial Control application check the checkbox next to it. Once you’ve done that, you’ll need to reboot the JNIOR to get the application to start running. Once the Serial Control application is running, you will then need to set the port number or serial settings its listening on.
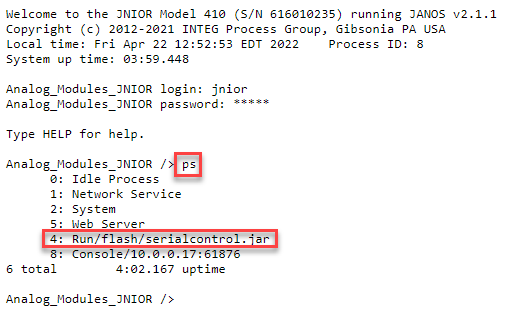
You can check if the application is running after the reboot by going to the Console Tab of the JNIOR Web Pages and entering the command ‘ps’. This will show you all the processes running on the JNIOR, and if you enabled Serial Control is should be listed as one of the those processes. With Serial Control running, you can also check if Serial Control is listening on the correct port by running the ‘netstat’ command. The Serial Control connection should display when the ‘netstat’ command is entered in the command line.
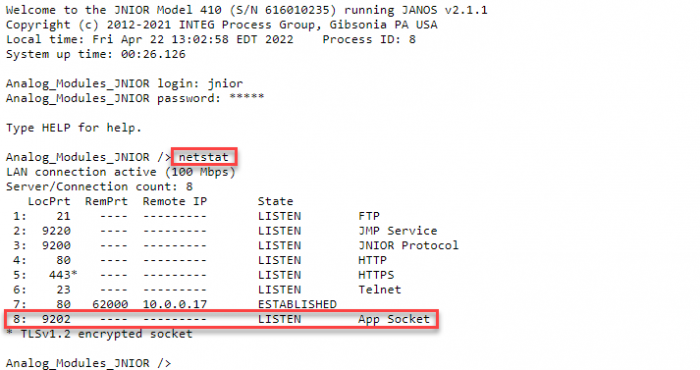
Once Serial Control is running, now the Cinema Server needs a device created in its interface to connect to the JNIOR. You’ll create an Ethernet or Serial device in the Cinema Server interface, and you’ll set the IP to the IP of the JNIOR or the settings for the serial connection. For either a Ethernet connection or serial connection you configure them to match the settings in the Serial Control registry.
Example Commands⚓︎
Once that device is made, you’ll make commands in the Cinema Server interface to send to the Serial Control application. Here are some examples:
ASCII Commands
-
::C1 - Close relay output 1
-
::O234 - Open relays 2, 3 and 4
-
::C* - Close all relay outputs
-
::O+2 - Open relay 10
-
::C1p=1000 - Pulse relay 1 closed for 1 second
Here is also a post that goes over commands that Serial Control can receive after a connection to it is made from the Cinema Server. With these commands created you should be able to send commands from the Cinema Server to Serial Control on the JNIOR.
If both the Cinema Server and the JNIOR are configured as stated above and the connection doesn’t appear established when trying to send the JNIOR commands, you may need to reboot both devices for your settings to take effect.