3 Channel Dimmer Example⚓︎
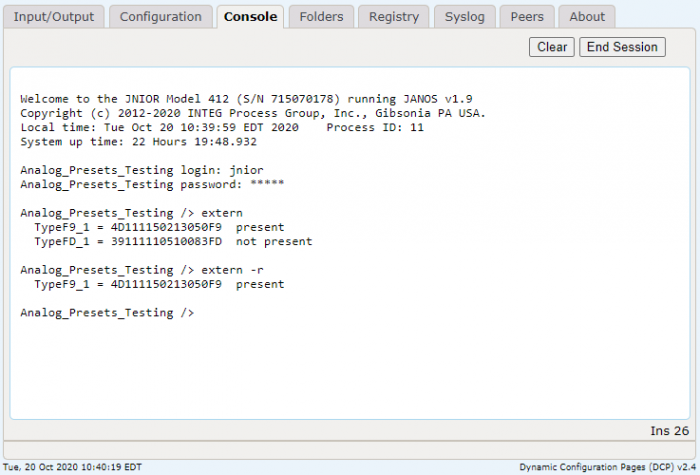
Here is an example to control the 3 Channel LED Dimmer module. After installing the update project and accessing its web page, you’ll want to check if module is connected. On the JNIOR Web Page you’ll type extern to see what expansion module’s are connected. After confirming that yours is there, if you see other modules still on the list that are not longer connected you’ll want to run the extern -r command to remove device from the list that aren’t currently in use.
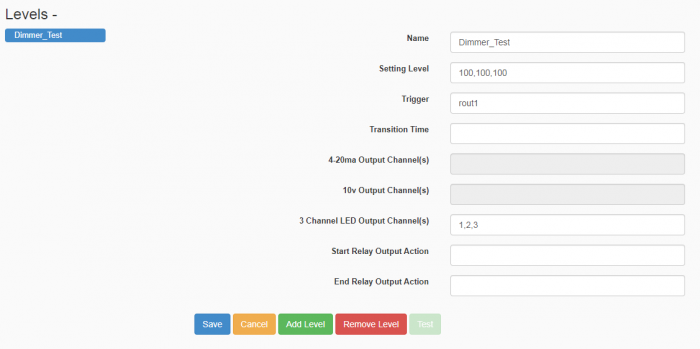
Next you’ll access the Analog Presets Web Page, and add a new Level. Once you’ve named the level, you’ll want to go to the 3 Channel LED Outputs field and enter 1,2,3 so that the channels we are changing on the Dimmer are 1,2, and 3. If you can’t access that field, but have connected a 3 Channel LED Dimmer and ran the extern command, refresh the page and it should be accessible. Next you’ll set the Trigger value to rout1 so that the level will activate when Output 1 on the JNIOR is ON. After setting that field, then go to the Setting Level field and enter 100,100,100. This will set the 3 Channels on the Dimmer to 100. After saving, you should now have the JNIOR’s Analog Presets page to set the Dimmer’s 3 channels to 100 when Output 1 turns ON.