Using Tasker to Publish a MQTT Topic
In Tasker, the JNIOR can interact with the MQTT application to publish data to a specific topic. This post explains how with an example.
To start, you’ll want to make sure that you have both the Tasker and MQTT application. Once you do, we’ll start with opening the MQTT application web page which you can access by opening a web browser and going to the URL http://JNIOR_IP/mqtt. The MQTT page is where we configure the MQTT broker, which manages all topics and handles the subscriptions. To use MQTT you need to find a broker to interact with. The one we are using in this example is broker.hivemq.com which is free. We don’t recommend this broker for anything serious or commercial, as it is not secured or dedicated.
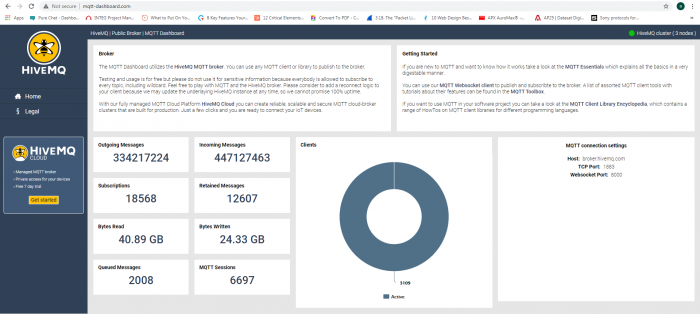
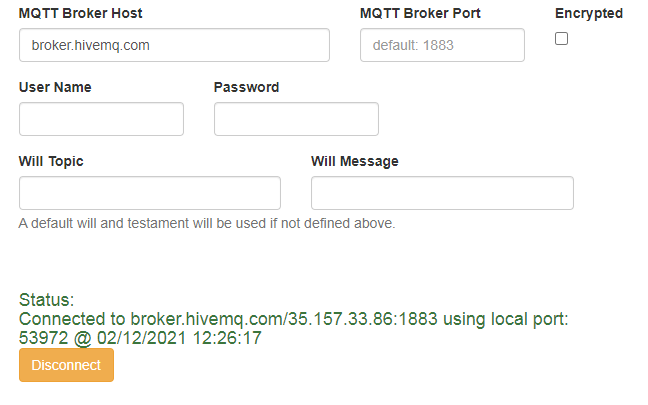
For this example we will enter HiveMQ’s broker information on the right side of the page. Not all the boxes are required. The only information we need for the HiveMq broker is the MQTT Broker Host address. HiveMQ uses the default 1883 port number. After that if the connection hasn’t already been set, click the connect button and you should be connected with the HiveMQ Broker.
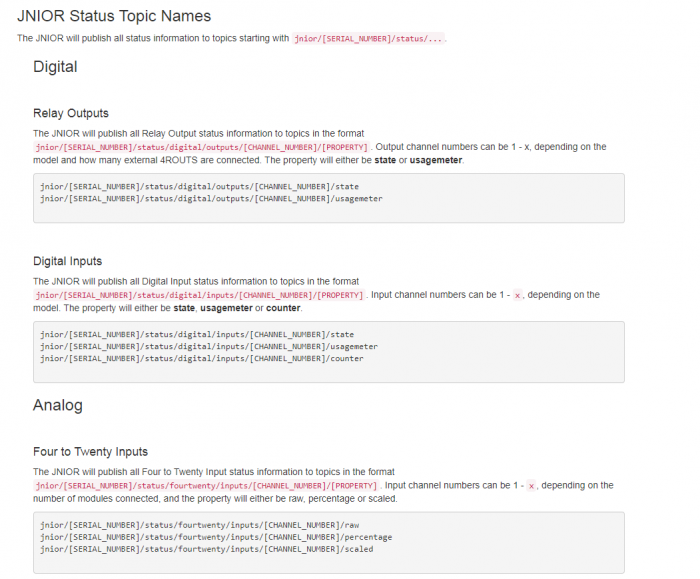
NOTE: The bottom of the MQTT web page also shows what topics you can interact with for MQTT. This will be useful as a reference when creating the MQTT publish action in Tasker.
Once you have established a connection with a broker on the MQTT web page, the next step is to open the Tasker web page. Once there, the first thing you’ll want to do is create a new workspace. We’ve named our example MQTT_Example.
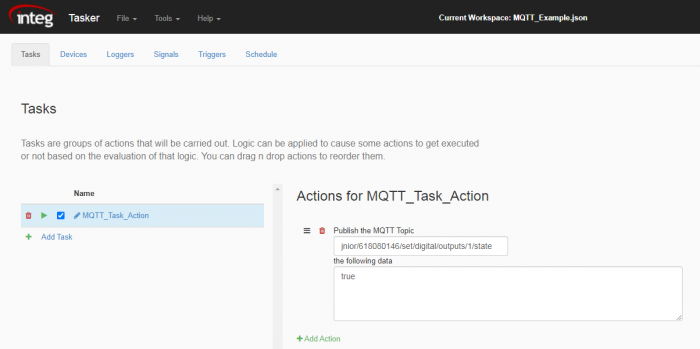
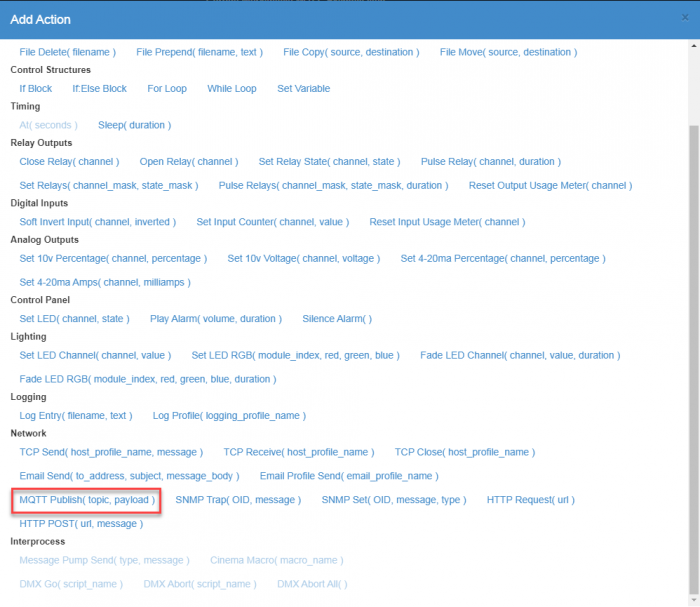
Once the workspace is created you’ll want to create a new Task in the Task Tab, and then add the MQTT publish action from the Add Action button to the Task.
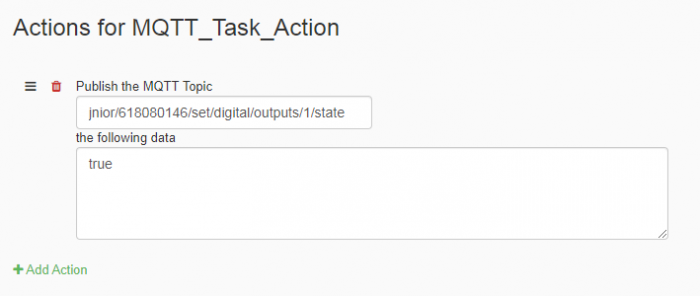
After adding the MQTT publish action, you can now set the topic in the top field of the action, and the data you wish to publish to the topic in the bottom field. In this example, we publish to the state of output 1 on a JNIOR to switch it from false to true, turning the output ON.
After executing this task, you will have published an MQTT topic to your JNIOR and set Output 1 to ON!