Using Devices in Tasker
One of the useful things about Tasker, is that it can include communicating with other devices within its tasks. This is possible by including a networks action, but before those actions can be used devices need to be added to a Tasker application. This post will explain how to create devices to be used in actions for tasks.
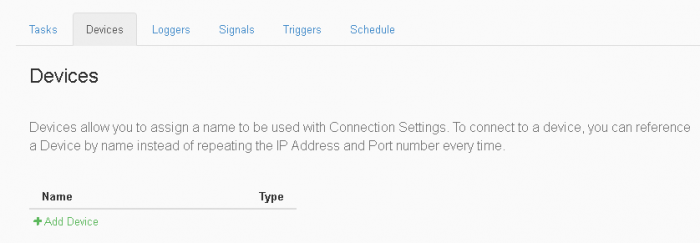
To start, we’ll begin by going to the devices tab of the Tasker application.

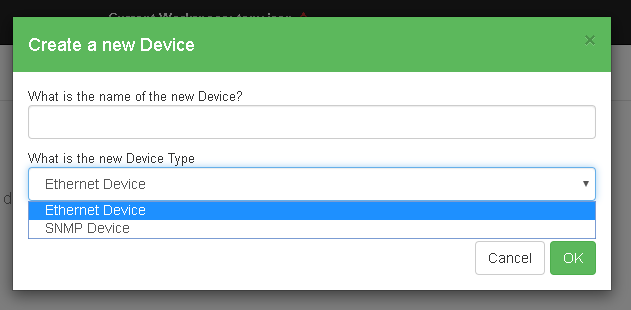
Here we can select the “Add Device” button which brings up a dialog box to add a device to the current workspace.

In this dialog, two things need to be defined to create the device. This first value needed is the name of the device. The second value needed is the device type, which can either be an Ethernet or SNMP Device. Depending which Device type you choose changes the what information you can configure for the device after creating it.
Creating an Ethernet Device
If the Ethernet Device type was selected, the configurable option for the created device should look like this:

Two values of the Ethernet Device need configured in order to use it in a Task action, the IP Address and the TCP Port values. These need to be set to the IP Address and TCP Port values on the device, so that when they are used in actions, the JNIOR can properly communicate with the device. Another post has an example of using a TCP Send with an Ethernet Device.
Creating an SNMP Device
If the SNMP Device type was selected, the configurable option for the created device should look like this:

Three values of the SNMP Device need configured in order to use it in a Task action which are, the IP Address, the UDP Port, and the Community Name. These are needed for the JNIOR to connect to the SNMP Device and you obtain them from the SNMP Device. A different post shows how to use a SNMP Device with an SNMP Trap.
With this, you should have created devices in Tasker that can be implemented in actions.