Sending a SNMP Trap with a Custom Message via Tasker
This feature is available in Tasker v3.1 and later.
The SNMP application offers built-in Traps when the digital inputs and relay outputs change. Tasker takes this further allowing you to send a SNMP Trap as a part of a Task. The value of the Trap can be custom and dynamic based on the message building rules of Tasker. An example of using a custom SNMP message in Tasker is below.
The first thing we need to do is make sure that SNMP is running. The feature covered in this post is available in SNMP v2.6 and greater. Once we know that SNMP is running we can Create or Open a Tasker Workspace.
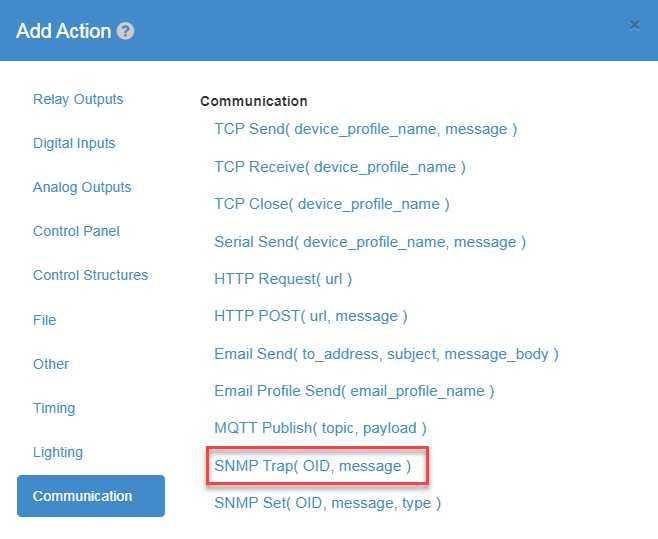
To send a SNMP Trap we will need to add the SNMP Trap action to a Task. You can create a new Task for this action or add it to an already existing Task. The action will ask for the SNMP OID (Object Identifier), the message to send and the device to send the Trap to. The device to receive the Trap can be the built-in Trap Host that is defined in the SNMP application or a new one can be defined in the Devices Tab.

Upon selecting the SNMP Trap action you will be presented with the following

Here is what it will look like after entering some information

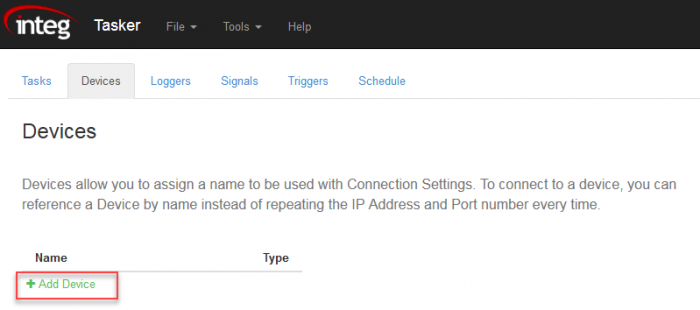
Without defining a SNMP Device, the Trap will be sent to the Trap Host that is defined in the SNMP application. You can optionally define a new Trap Host by clicking + Add Device in the Devices Tab.

You will be presented with a Dialog asking for a Device Name and the Device Type. Enter any name and select SNMP Device from the Device Type drop down.

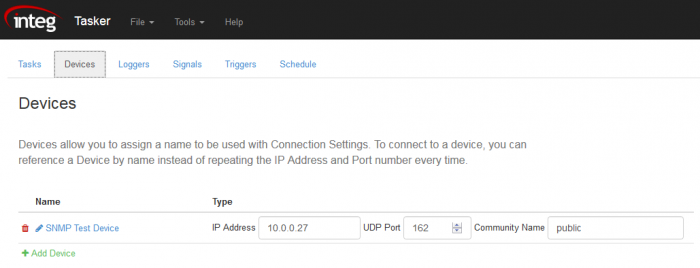
Now you can enter the Trap Host information as shown here.

Now back in our Task Action we will see this Device as an option.

Save the Workspace in the File menu and your Custom Trap will be able to be sent!
Advanced Usage
You can send a dynamic message. A dynamic message is one that has different data based on our message building rules. Here we will send the current temperature.

A defined Signal could also be used here instead of temp[1].f and a Trigger could be used to cause the Trap to get sent as described in the using signals and triggers post.
