Using Signals and Triggers in Tasker
Signals and Triggers are very useful tools in the Tasker application. Signals are I/O values on either the JNIOR or a compatible expansion module with the JNIOR. Triggers are reactions to when a signal occurs. This post will explain all the parts of the Signal and Trigger tabs in detail.
The Signal Tab
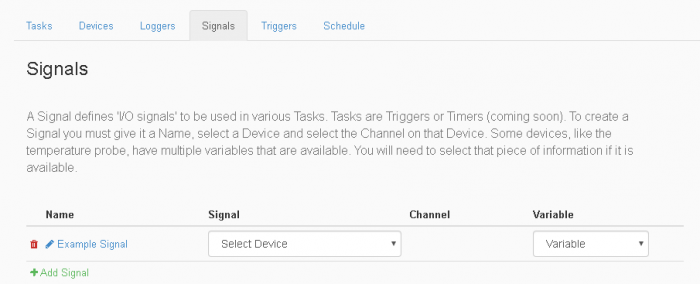
To start, since signals in the Signal tab can be used in triggers we’ll start with Signals. Signals are I/O values on either the JNIOR or a compatible expansion module with the JNIOR. Each Signal values has what device the Signal is coming from, the channel number of the value, and then the type of value its getting. These can be used either in a Trigger or to set/evaluate the value of a variable defined in a task.
The Trigger Tab
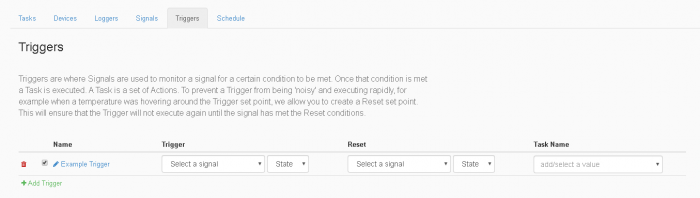
The Trigger is a reaction to a Signal value. Triggers are made up of first, a Trigger value that watches a Signal to react to, along with what the Signal value needs to be to activate the Trigger. Second, is the Reset value that monitors a Signal like the Trigger value does. This is optional and a reset value is not required. If you don’t set a reset value for a Trigger, the Trigger value will always activate the Trigger. If you do add a Reset value, a Trigger that has activated won’t activate again until the reset value condition is met. Lastly, a task name is selected as the task to run when the Trigger value is met and the Trigger activates.
There are currently 5 types of events that can be added as a value for a trigger or reset. The first is a discrete signal, which consists of Input or Output changes going High or Low. The second is a continuous signal, which pertains to the temperature and 4-20ma/10volt values that are constantly being reported and updated. Discrete and continuous values use the signals created in the Signal Tab as the values available in a trigger. Third is the control panel switch signal, which as is name suggests is for when a switch on the control panel is pressed. Forth is the multi-switch control panel signal, which is that same as the normal control panel signal but is activated from two switches being pressed at the same time. Lastly, is the delayed Reset which activates a reset after a certain duration. As the name suggests, this is only available for the reset and can’t be used as a trigger signal. The control panel and delay reset values do not need to be made as signals in the Signal Tab to be used in a trigger, while the discrete and continuous signals do.
These steps show show you how to properly create a Signal and Trigger.
Example
The example below will show you how to make a Trigger activate when Relay output 1 on the JNIOR goes High.
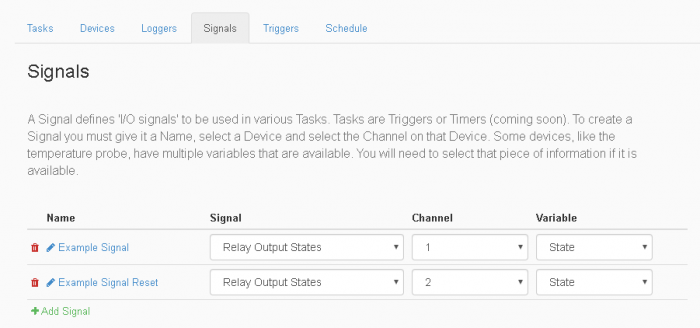
We’ll create two Signals with the first ones values being: Device is the Relay Output states of a JNIOR, the channel 1, and the type being the state. The second ones values would be: Device is the Relay Output states of a JNIOR, the channel 2, and the type being the state.
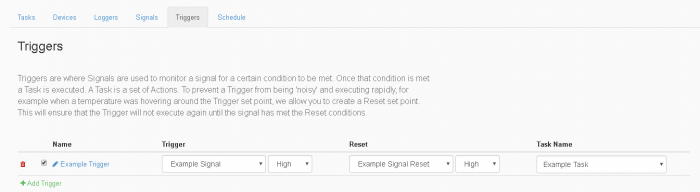
Afterwards you would begin configuring a Trigger. The Trigger values would be the Example Signal we created, and its trigger value will be high. For the Reset values, we’ll select the Example Signal Reset we created as the Reset value, and its reset value will be high as well. Lastly, we’ll pick whichever task we want to run during the Trigger activation as the Task value. In this example my task I created is Example Task. The final product of this example is a trigger that will activate when Relay Output 1 goes high. It won’t activate again though until Relay Output 2 goes high.