Looping Actions in Tasker
The Tasker application has a lot of different functionality built into its actions, but it also can handle logic. One of those logic actions that you can create in Tasker is the loop action. This post will create two loops in Tasker, one being the for loop and the other being the while loop.
Creating a For Loop
To start, create a new workspace, by going to the File Drop-Down and selecting new. After that, go into the Task tab of Tasker and select the “Add Task” button. Once you name your Task, you’ll click on it and select the “Add Action” button. This will bring up the Action Dialog box. Here we need to select the for loop action in the Control Structures section of the Action Dialog box. Once we have our loop in the task, we’ll want to add two more actions inside of the loop by selecting the “Add Action” button inside of the loop. Here we’ll also select the Pulse Relay action and the Sleep action.
Setting the For Loop Action Values
Now that we have our Task’s actions added, we can configure their values to what we want, which is to have our loop use a variable to pulse relays 1 – 3 for 2 seconds, with a 1 second delay between them. To do this, we’ll start by setting the variable in the first field value of the loop action, which in this example we will make ‘a’. The other loop fields are to set how many times the loop will repeat, and since we want to pulse 3 relays we’ll set the second loop field to 1 and the third to 3.
Next for the Pulse Relays action, the first field will be replaced with the variable we created in the first field of the loop action, ‘a’. After that we’ll want the second field set to 1, since we want it to pulse for 1 seconds. Lastly, we’ll set the sleep action to 2 seconds so that no relay is pulsing at the same time as another, and has 1 second delay between each other.
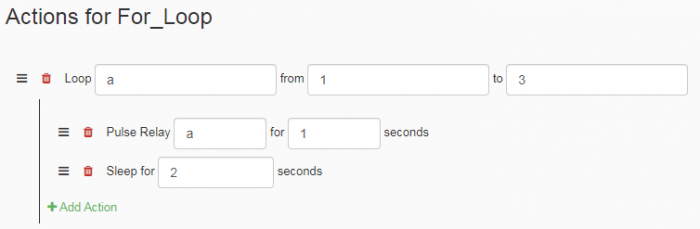
With this, your loop should be configured properly. Now it will loop through output relays 1 – 3 on your JNIOR, pulsing each relay for 1 second with a 1 second delay between each relay pulsing.
Creating a While Loop
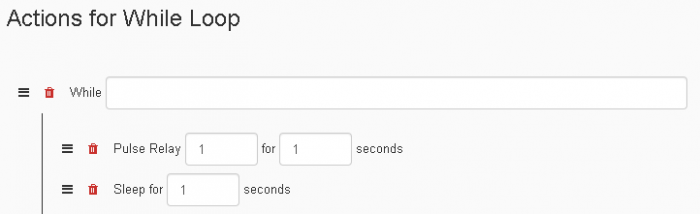
For creating a while loop, in your workspace go into the Task tab of Tasker and select the “Add Task” button. Once you name your Task, you’ll click on it and select the “Add Action” button. This will bring up the Action Dialog box. Here we need to select the while loop action in the Control Structures section of the Action Dialog box. Once we have our loop in the task, we’ll want to add two more actions inside of the loop by selecting the “Add Action” button inside of the loop. Here we’ll also select the Pulse Relay action and the Sleep action.
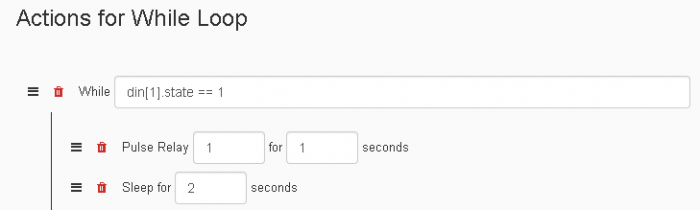
Setting the While Loop Action Values
Now that we have our Task’s actions added, we can configure their values to what we want, which is to have our loop use a variable to check the state of input 1, and if its high (equal to 1) to pulse output 1 for 1 second with a one second delay between it every time it pulses. To do this, we’ll start by setting the variable in the field value of the loop action to din[1].state == 1 to check if input 1’s state is high. Then we’ll set the pulse output of whichever relay we wish to pulse for 1 second, with a second sleep so it will pulse for 1 second, and then wait 1 second.