Home Assistant MQTT Entity to Monitor JNIOR Output
This post will go over how to create an entity in Home Assistant that will keep track of a JNIOR Output using MQTT.
Setup MQTT on the JNIOR
Before beginning to setup Home Assistant, you’ll want to make sure that you have MQTT setup on your JNIOR. Here is a post you can follow to setup MQTT on the JNIOR.
Setup Home Assistant
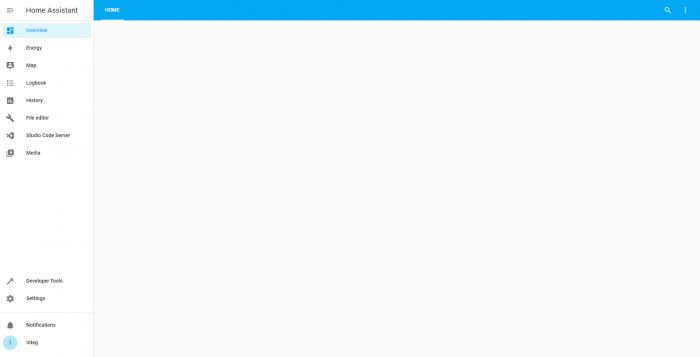
Now to start configuring Home Assistant, you’ll need to make sure you have a working setup of it. Here is the installation walkthrough on Home Assistant’s website. Once you have successfully setup a working setup of Home Assistant, you should be able to access its Configuration Web Page at homeassistant.local:8123 in a Web Browser. It should look like this when you access it.
Add MQTT Integration
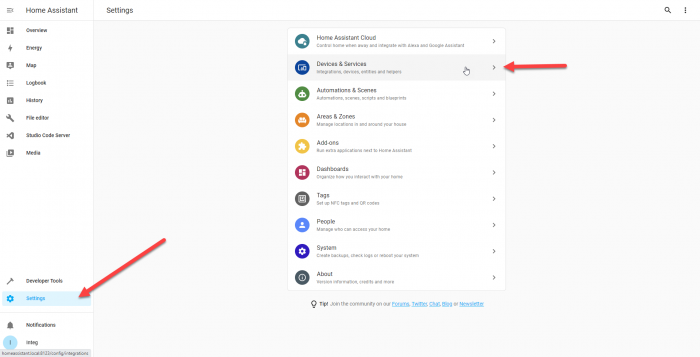
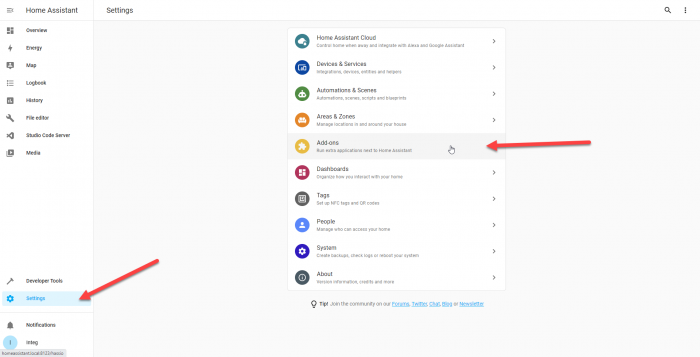
After you’ve setup Home Assistant, you can now begin to configure Home Assistant to monitor a JNIOR Output. To do this the first thing we need to do is setup the MQTT integration. To do this you’ll go to your settings and select Devices and Services.
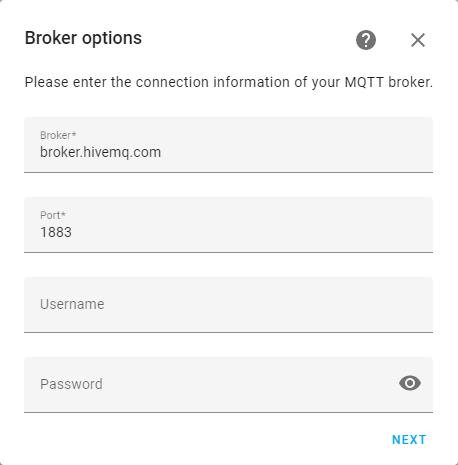
Once there, select Add Integration at the bottom of the page and you’ll search for the MQTT integration and add it to your current integrations. Once MQTT is added to your integrations, you’ll then need to configure it to use the same MQTT Broker as your JNIOR device. Here we are using broker.hivemq.com.
Get File Editor Add-on
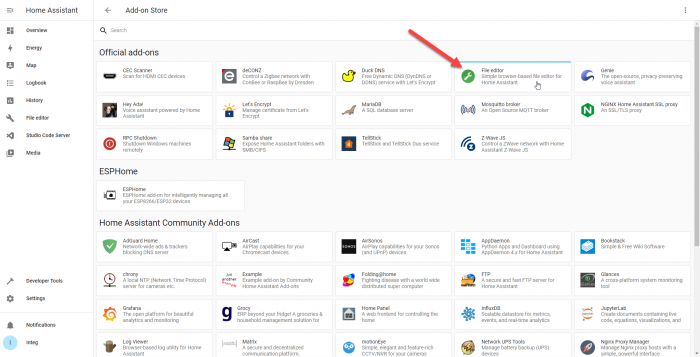
Select next and finish configuring the MQTT integration. After its completed, the next thing we can do is setup an MQTT Binary Sensor Entity. This will represent an on/off status of our JNIOR Output. To do this, we are going to need to get an add-on for Home Assistant. To do this we will select Setting again and go to the Add-ons.
Once in Add-ons, you’ll look for the add-on called File Editor. You’ll select that add-on and install it. (Adding it to your sidebar in its installation settings is helpful also.) This is needed to edit your configuration.yaml file. What is configuration. yaml? The configuration.yaml file is the main YAML file used by Home Assistant to gather all of the information about the users desired configuration. In this file we will define the MQTT Binary Sensors, and we need the file editor add-on to do so.
Configure .yaml File
Once the File Editor add-on is installed we’ll go to it using the sidebar in Home Assistant. The File Editor will display all the files in Home Assistant, and the one we are interested in is the configuration.yaml file explained earlier. In this file we are going to add the MQTT Binary Sensor platform inside it. With the MQTT application on the JNIOR, topics on the Broker can be updated two different ways. The first is by updating a specific topic on the broker, and the other is using a JSON payload to update multiple topics at once. To show both ways, here is a picture of a configuration.yaml file after adding both ways to it. (This setup will be looking at Output 1 on the JNIOR, since in the state_topic lines it specifies Output 1)
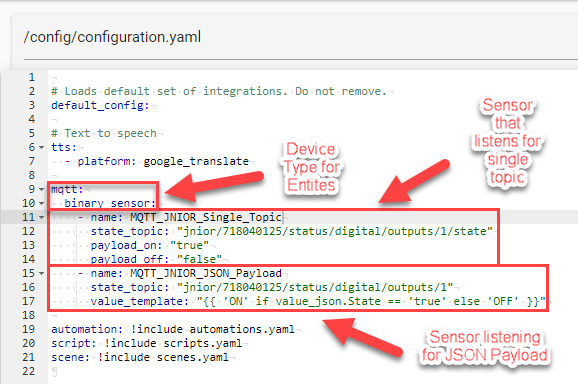
# Loads default set of integrations. Do not remove.
default_config:
# Text to speech
tts:
- platform: google_translate
mqtt:
binary_sensor:
- name: MQTT_JNIOR_Single_Topic
state_topic: "jnior/718040125/status/digital/outputs/1/state"
payload_on: "true"
payload_off: "false"
- name: MQTT_JNIOR_JSON_Payload
state_topic: "jnior/718040125/status/digital/outputs/1"
value_template: "{{ 'ON' if value_json.State == 'true' else 'OFF' }}"
automation: !include automations.yaml
script: !include scripts.yaml
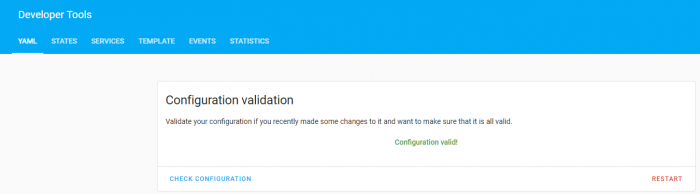
scene: !include scenes.yamlOnce this is added to your configuration.yaml file, head over to the developer tools above the settings option in the Home Assistant sidebar. On this page click the ‘check configuration’ button, and if the configuration is valid, you’ll then select the ‘restart’ button.
Setup Home Assistant Dashboard
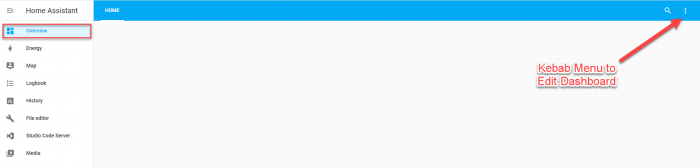
Once Home Assistant has restarted, we can now go to the overview page of Home Assistant and edit our Dashboard. In the Dashboard we are going to click on the kebab menu and select edit Dashboard. This will allow us to add entities that will display the statuses of our JNIOR’s I/O sensors.
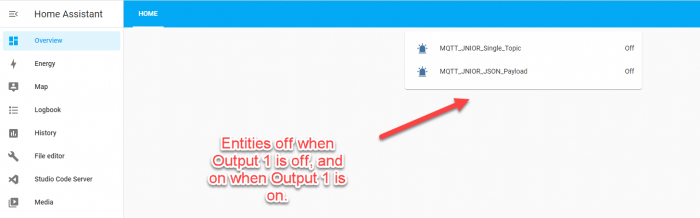
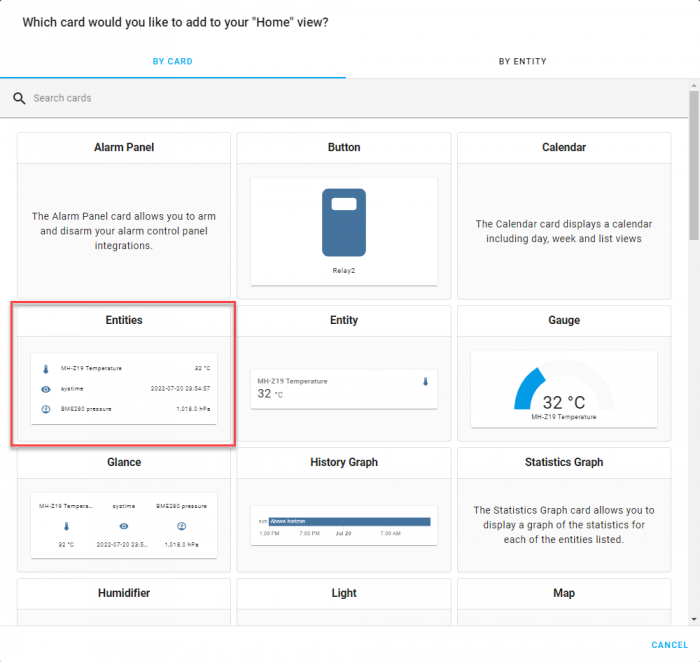
With the Dashboard Editor open, we’ll add a new card to the Dashboard. The card we want to add is the Entities Card, as this will let us display both MQTT Binary Sensors we declared in the configuration.yaml file. This will allow us to show how our JNIOR’s output is being monitored.
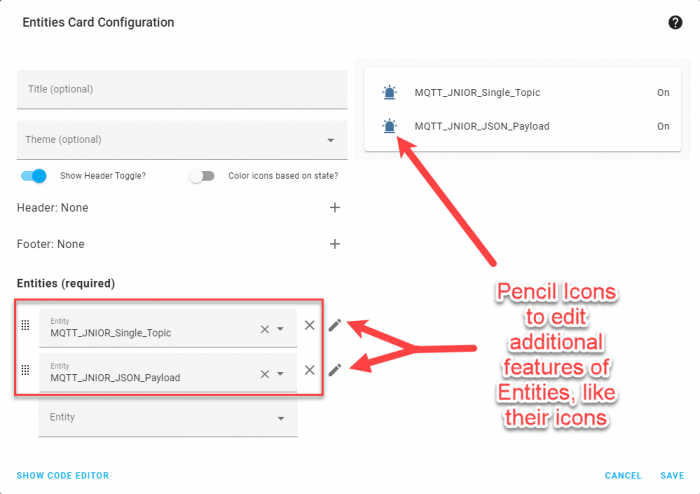
Inside in the Entities card, we’ll select the two MQTT Binary Sensors we made. In this example I also edit each of the entities to use different icons. This is optional, but you can change certain attributes of the card by clicking the pencil icon next to either entity.
Save this Card Configuration, and you should now have a dashboard with your entities. When the JNIOR’s output changes, so will your entities on your homepage! (Depending on if you chose the JSON Payload, Single_Topic, or both in the JNIOR’s MQTT application, only one may change.)