UDP Broadcast with Cinema
While the Cinema application has the functionality to send a UDP command to another JNIOR, did you know that it can do a UDP broadcast command also? This allows the JNIOR to send a UDP command to any JNIORs listening on that UDP port at the same time. This post will explain how to set this up. This post assumes you’ve already installed the Cinema application on your JNIOR. If you haven’t, here is a post that shows you how to install Cinema on your JNIOR.
Device File
First, to setup the broadcast you need to create a RAW UDP device in the support tool under the device tab. Here you can add a device from the ‘Add’ button at the bottom of the Device tab, and after naming it (I’ve named it ‘UDP_Broadcast’ for this example) you assign it as a RAW UDP device type. For the IP Address, it needs to be set to 255.255.255.255 so when this device is sent to from a macro command, it will send to any device listening on the same UDP port. The UDP port will be whatever UDP port you want to broadcast on. Just make sure the devices you are broadcasting to are also listening on that same UDP port (This example uses port 5554).

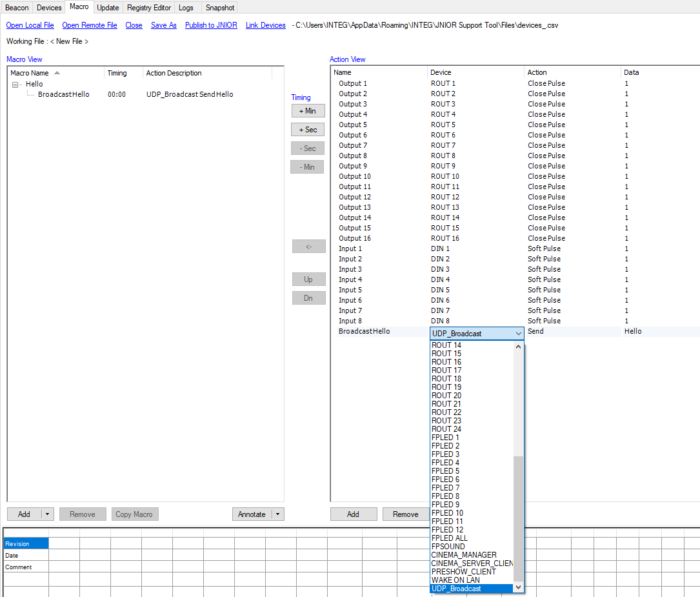
Macro File
Once this device is setup, you’ll save the device file locally and publish it to the JNIOR that will be broadcasting the command. You’ll then move onto the Macro tab in the JNIOR support tool. The first thing to do here is to select the ‘Link Devices’ option and select the device file you just created. This allows you to reference the ‘UDP_Broadcast’ device you created in your macros. Here in the Macro tab, a macro can be made that sends a command out to JNIORs via the UDP_Broadcast device. You’ll select the ‘Add’ button at the bottom left of the Macro tab, and this will add a macro in the macro view. You’ll name the macro (I’ve named it ‘Hello’ for this example) and then you’ll add an action to this macro. You’ll select the ‘Add’ button at the bottom right of the Macro tab this time, and add an action to the action view. Here you’ll name the action (I’ve named it ‘Broadcast Hello’ for this example) and then you’ll set the action’s device to the ‘UDP_Broadcast’ device from the device file we created. After this you’ll select the ‘send’ action for the macro, and for the data you can enter the whatever data you want to broadcast to other devices (I’ve made the data ‘Hello’ for this example). Lastly, you’ll select the macro ‘Hello’ and the action ‘Broadcast Hello’ at the same time, and then select the ‘<-‘ button between the Macro and Action views. This will add the ‘Broadcast Hello’ action to the ‘Hello’ Macro. After this you’ll save the macro file locally and publish it to the JNIOR that will be broadcasting the command.
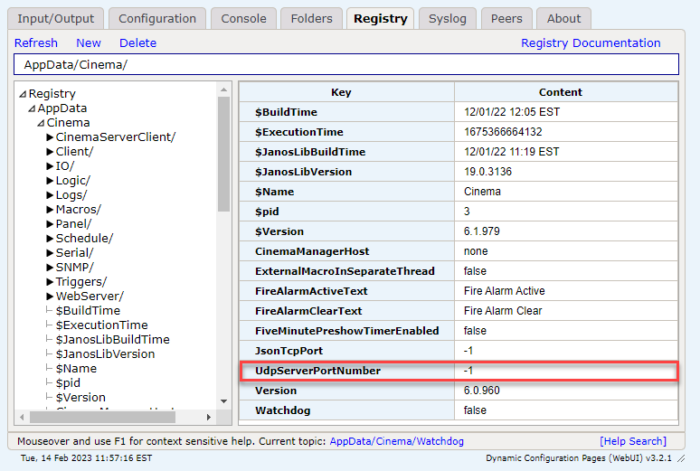
Setting Cinema UDP Port
Your JNIOR should now be setup so when the ‘Hello’ macro is activated, it will broadcast to any JNIOR listening on port 5554 the command ‘Hello’. If you are trying to broadcast to other JNIOR’s running Cinema, you can send UDP commands to their Cinema application directly. Just make sure you have Cinema’s UDP port setup for each JNIOR that should be listening for those UDP commands. You can do this by going to the registry of a JNIOR, and under AppData/Cinema/ you set the registry key UdpServerPortNumber to the UDP port Cinema should be listening on. After setting this registry key, make sure to reboot that JNIOR so the change takes effect.