Web Pages for Bundled Software
Web Pages have been added for Bundled Software Applications! These web pages have been implemented to make configuring the Bundled Software easier. This post will go over the different tabs the Bundled Software Pages have.
To start, there are 5 tabs available on the Bundled Software Pages. Other than the On Boot page, each tab should display different registry settings to configure a different application in the Bundled Software.
On Boot Page
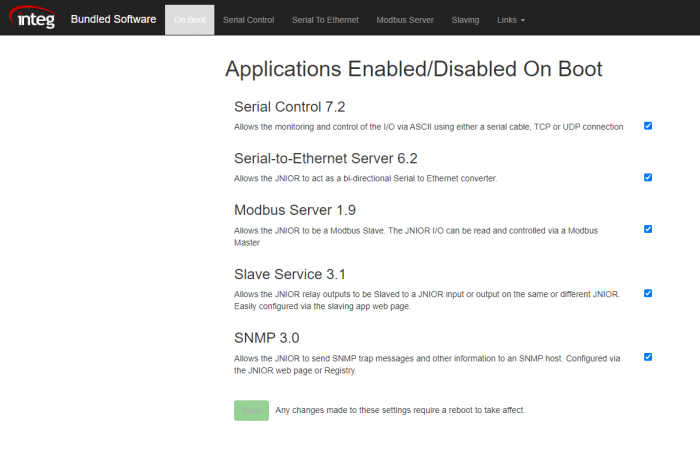
The On Boot tab is the opening tab when the Bundled Software Pages are loaded. Instead of letting you edit the registry keys of one of the applications like the other tabs, this page allows you to set which Bundled Software Applications will run on boot. Keep in mind that when setting one of these applications to not start on boot, you won’t be able to access that applications tab in the Bundled Software Pages until its enabled again.
Serial Control
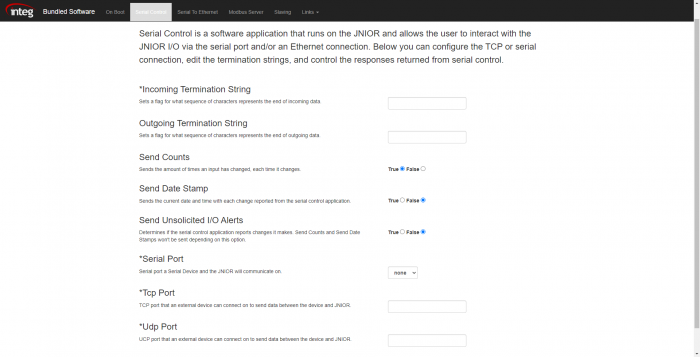
Serial Control can accept one or more connections from an external device and this connection can be over the serial port and/or the Ethernet port. The Serial Control tab allows you to edit the registry keys of Serial Control from the web page. Below is a quick explanation for each field.
- Incoming Termination String – Sets the string that Serial Control looks for at the end of each message sent to it to know if that is the end of the message being sent.
- Outgoing Termination String – Sets the string that Serial Control adds to the end of each message it sends. The external device being sent to needs to know to look for this Outgoing Termination String.
- Send Counts – Determines if the JNIOR reports each time an input changes to the external device connected through the Serial Control Connection.
- Send Date Stamp – Determines if each report of an I/O change on the JNIOR reported through the Serial Control Connection gets appended with the current date and time.
- Send Unsolicited I/O Alerts – Determines if any Alert such as I/O Counts or Date Stamps should be allowed through the Serial Control Connection.
- Serial Port – Sets the Serial connection that Serial Control connects on.
- TCP Port – Sets the TCP port that Serial Control connects to.
- UDP Port – Sets the TCP port that Serial Control connects to.
Serial-to-Ethernet
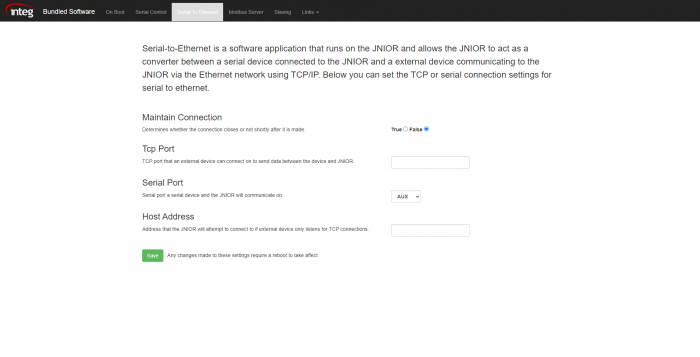
Serial-to-Ethernet lets you set up a connection between a device that can communicate via ethernet and a device that can only connect serially. The web page allows you to configure the port for the ethernet connection, the serial port of the serial connection, the host address of the device that the JNIOR will attempt to connect to if the external device only listens for TCP connections, and if the connection is maintained after being established.
Modbus
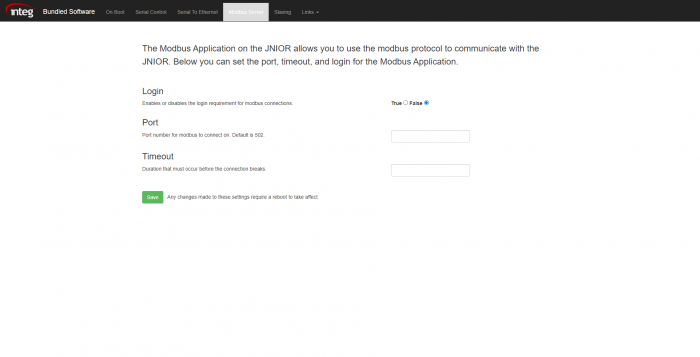
Modbus lets you set up a connection to the JNIOR using the Modbus Protocol. The Modbus tab on the Bundled Software Pages allows you to set up the port the Modbus Protocol uses, if login is required, and the amount of time in seconds without communication on the Modbus connection for it to timeout.
Slaving
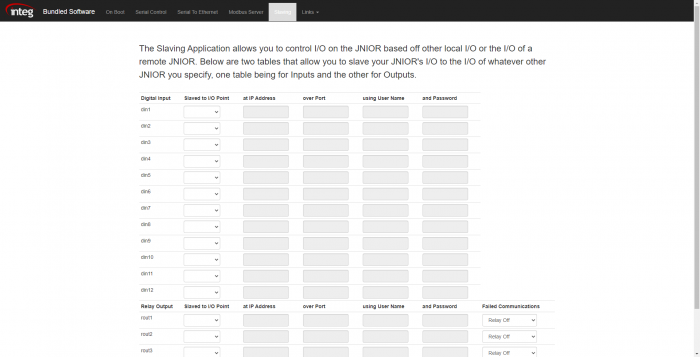
Slaving lets you control the I/O on one JNIOR by monitoring the I/O of another. There are two tables on the Slaving tab, one for inputs and the other for outputs. Each input and output on the JNIOR will be displayed in these tables, and from there can be set the I/O point they are slaved to, followed by the information of the external JNIOR that has that I/O point.
