Hello World
The “Hello World” application is the first application everybody writes when trying a new language or new device. This post shows you how easy it is to develop and execute a “Hello World” application on the JNIOR.
So what is a “Hello World” application? Here is a link to a Wikipedia page that covers that. https://en.wikipedia.org/wiki/”Hello,_World!”_program
Basically, we use this demo to show the ease of taking an application from the PC and executing it on the JNIOR.
Step 1: Write the program
You can use your favorite IDE for this. We use the NetBeans IDE from the Apache Foundation
View on GitHub
Step 2: Compile the Program
Compiling the program will take your java file source and compile it into a .class file. All of the .class files in the project are then packages into a .jar file. This is really helpful for most applications and project management.
To compile the application, IDEs will typically have a build menu. All IDEs are different and you might also need to define a couple options to get the .jar file to get built.
Step 3: Transfer the jar to the JNIOR
Again, there are many options to perform this task. The easiest method is to use the WebUI.
- Open the WebUI for a unit by going to
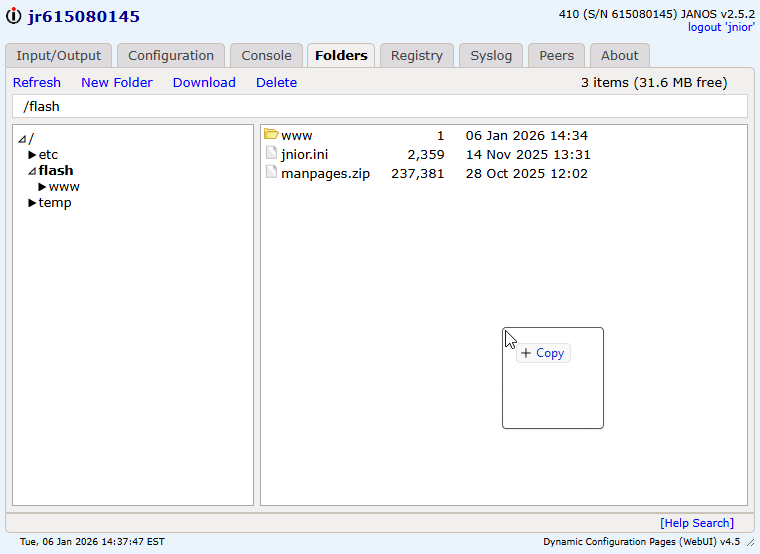
http://<IP ADDRESS>in your browser. - Next, navigate to the folders tab. We recommend loading your applications in the
/flashfolder. This folder will persist through power outages and when the battery eventually dies. - You can just drag and drop from your file explorer window in to the
/flashfiles views
Step 4: Execute the program on the JNIOR
You can use the terminal of your choice but, again, we are going to stick with the WebUI, and use the Console Tab.
- Navigate to the Console tab.
- Click on “Start Session”
- Login. The default credentials are jnior:jnior
- At the prompt, type the filename
helloworld.java.
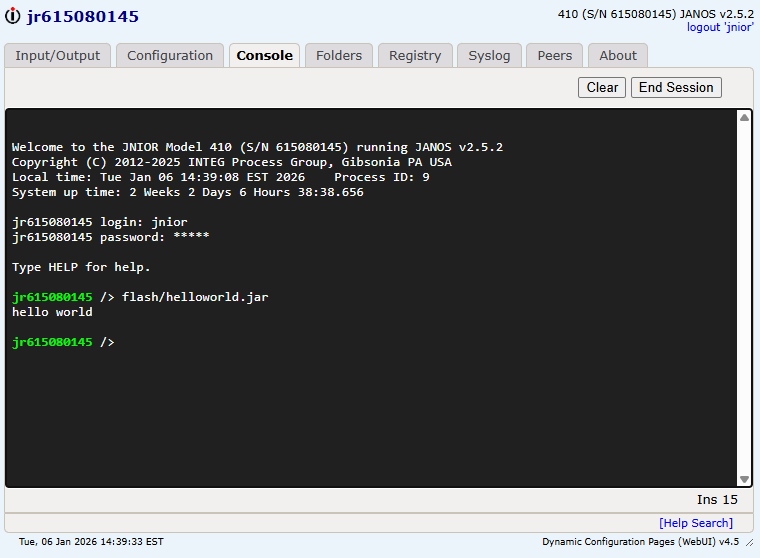
Notice the “hello world” output from the execution of our program.