Depending on how the registry keys are set here, the JNIOR’s communication between two devices will change. If the JNIOR is receiving commands serially and sending them out via TCP, then you’ll want the HostAddress key set to the device’s IP address you are sending to, and the TcpPort to that device’s port number. The SerialPort value should be set to the serial port the serial device is connected to on the JNIOR.
Configuring Registry Keys For Serial-to-Ethernet application
Written by Anthony Pavia on Nov 5, 2020 12:23 pm
When using Cinema, Serial Control PLUS, or Serial-to-Ethernet applications, users may want to utilize the serial port to communicate with other devices or send commands. When using the serial ports, you need to know what registry keys need to be set for serial port communication. This tutorial is for setting the registry keys for the Serial-to-Ethernet application.
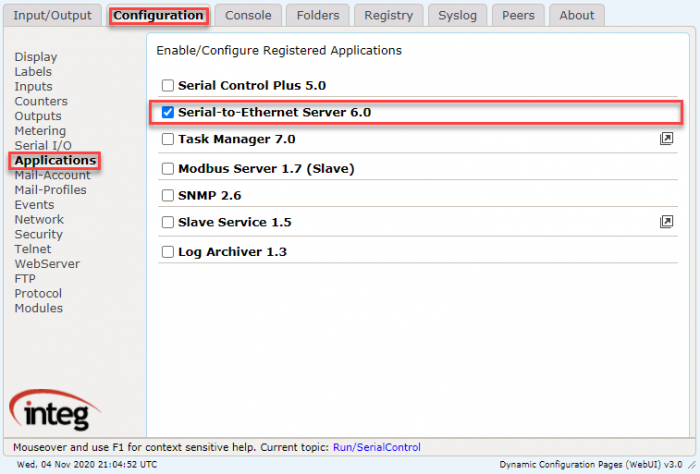
When using Serial-to-Ethernet, the first thing is to go to the JNIOR Web Page and go to the applications section of the Configuration tab. Once there, make sure the Serial-to-Ethernet application is checked and then reboot.
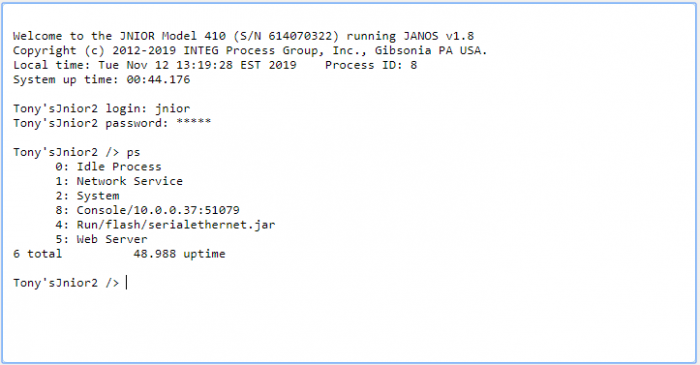
Once the JNIOR reboots, go to the Console tab and start a console session. Once logged in, type “ps” to see if the application is running.
Once it’s running, the registry keys for it should be created in the Registry tab. Go to the Registry tab, and under AppData/SerialToEthernet should be keys to set up Serial-to-Ethernet.
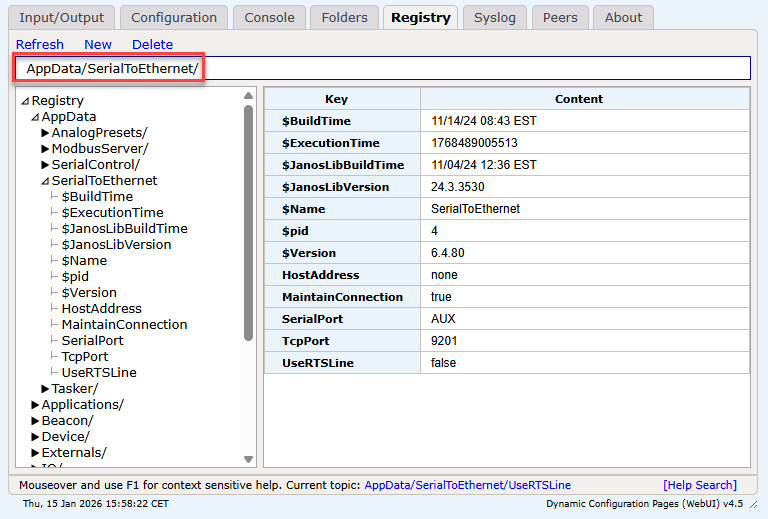
If the JNIOR is instead receiving commands via TCP and sending them out serially, then the registry keys will be set differently. For the HostAddress registry key, you’ll leave it as ‘none’ because the TCP device sending to the JNIOR will use the JNIOR’s IP. For the TcpPort registry key, it can be any valid TCP port you’d like, because we are defining the port that Serial-to-Ethernet is listening on for the TCP device to send to. (As a default value, we use 9201.) The SerialPort registry key should again be set to whichever port the serial device is connected to on the JNIOR.
Lastly, you’ll need to define the settings of your serial connection. This is done under the Configuration tab, in the Serial I/O section. Here you can change the settings for either the AUX or COM (RS-232) ports. These settings should be configured to match the settings of your serial device’s connection. (If you are using the COM/RS-232 port, make sure to disable the Boot Dialog for it.) Once set, give the JNIOR another reboot, and it should be ready to help your device communicate!
