Command Line Access – Diagnostic Port
The birth of any operating system, and this is true for JANOS (Series 4) as well, begins with serial access to a command line interface. There are often boot and diagnostic messages transmitted over that first communications channel. The Series 3 is based up the TINI Operating System and the RS-232 (COM) port located at the bottom of the unit next to the ETHERNET (LAN) port is that very diagnostic channel for TINI.
The DB-9F connector there was designed to be directly connected to the COM serial port on the PC. Only a straight-thru M-F serial cable was required. Communications are at 115.2 Kbaud, 8 data bits, 1 stop bit and no parity. There is no handshake and this port is 3-wire (Rx, Tx and GND). Today no PC is manufactured with such a COM port. Fortunately USB-to-Serial adapters are readily available and provide the necessary compatible connection point.
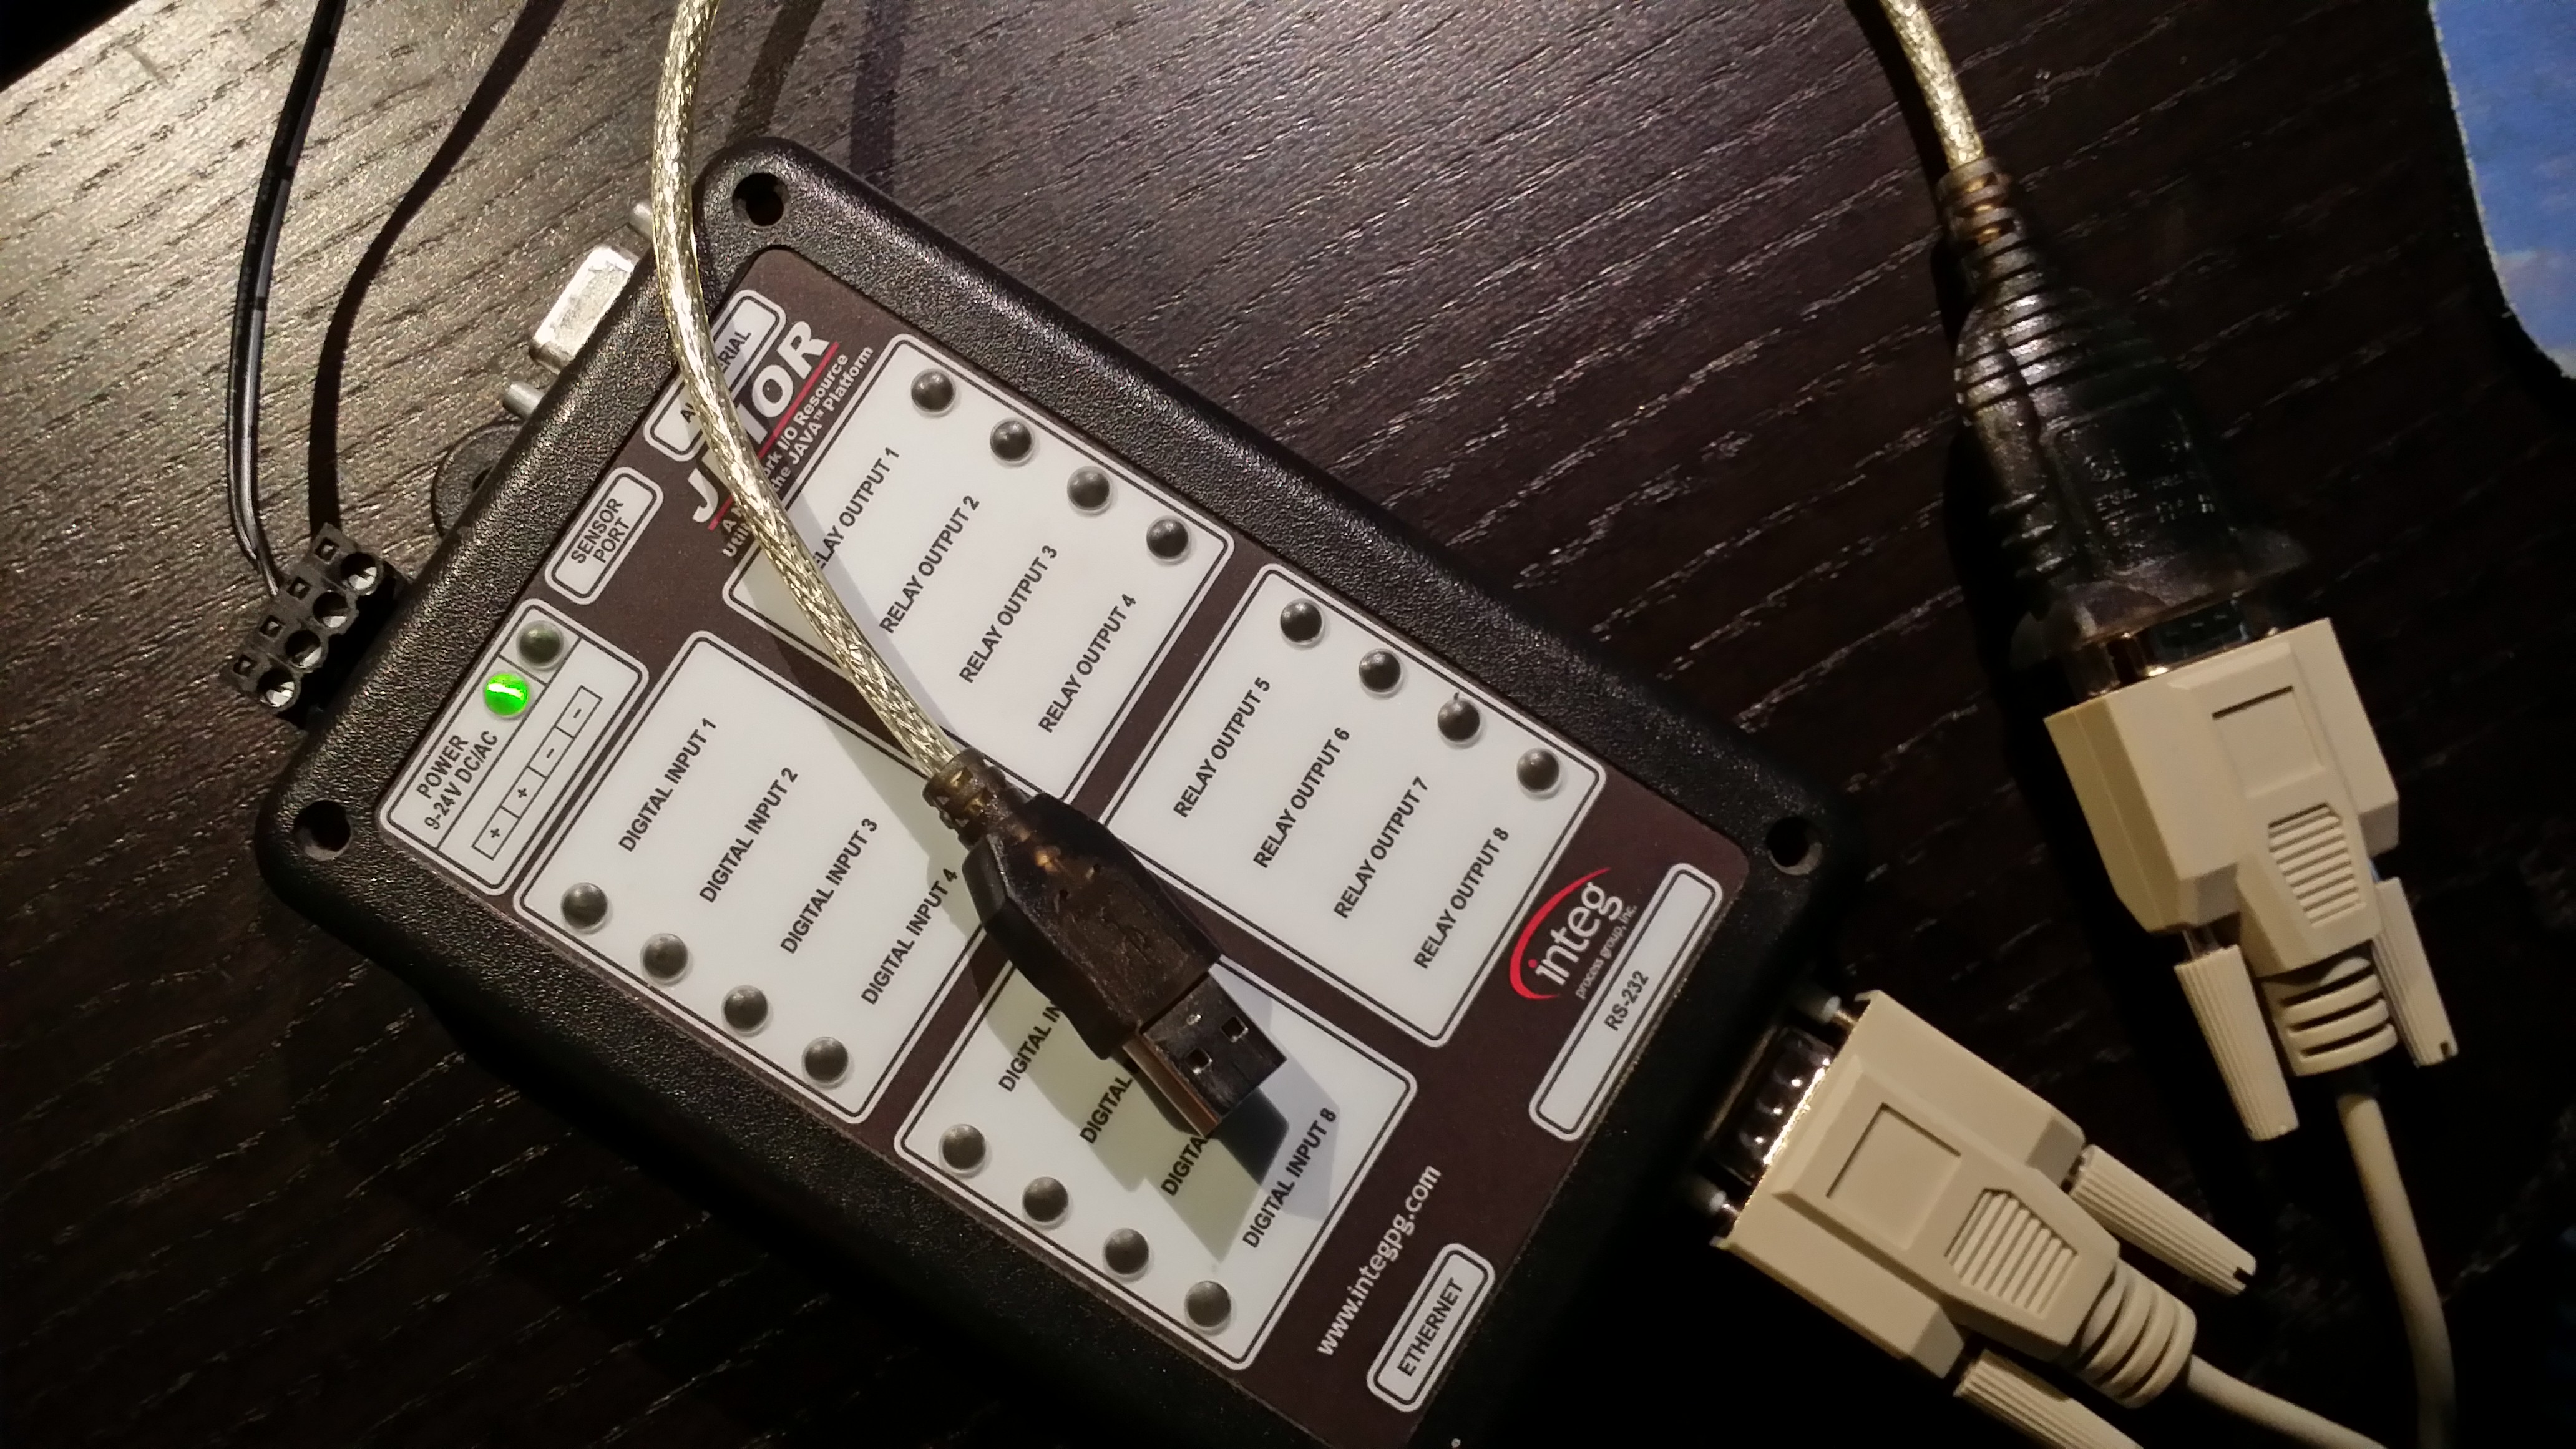
If you are working with the JNIOR for the first time you may want to first try this serial connection. A new unit or one that has been configured to work elsewhere will not be immediately compatible with your network. While there are alternative solutions to the network setup the serial connection is the most basic. It is the only place where you can “watch” the unit go through it’s boot procedures.
This connection point and its use remain consistent through the Series 4 products. The command line interface found there is the same. There is a huge difference in response (where the Series 4 shines) and the diagnostic messages are different.
Now with the JNIOR powered and the serial port connected to the PC you can use a Terminal program. We used to use hypertext but now MS no longer distributes that. Nice of them, eh? You can use PuTTY (http://www.putty.org/) and configure for the proper baud rate (115,200) and data format (8/1/none).
If you open the port and strike any key (i.e. Enter) you should obtain something like the following on a Series 3).
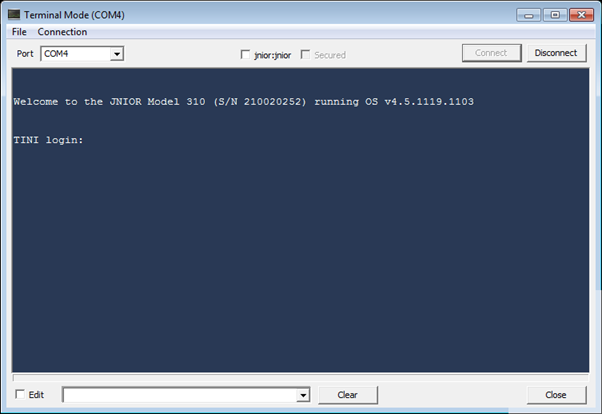
Here, for example, is a terminal program that I designed for JNIOR use in-house but PuTTY works perfectly. This one has the capability to force a jnior:jnior login (administrator account ‘jnior’, default password ‘jnior’) because, as you can imagine, we here at INTEG log into JNIORs a lot!
If you have obtained your JNIOR from a prior installation the passwords may have been changed. There is a significant chance though that they have not and the above jnior:jnior login could work. Most Series 3 JNIORs have gone into physically secure networks where customers have not had the need to vary from default passwords.
If you can successfully login to the ‘jnior’ account you will reach the command line. Note that if you access the command line through a network Telnet connection the ‘TINI’ prompt is replaced by the unit’s defined hostname. Byte default the hostname is the unit’s serial number prefixed with ‘jr’.
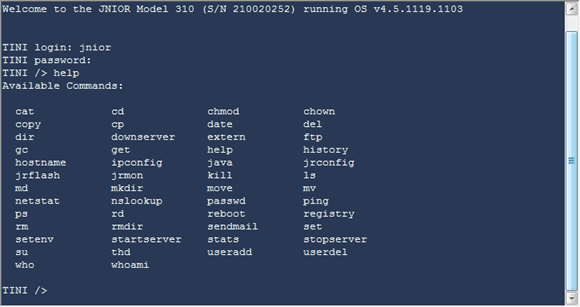
There are a number of commands available at this point. The command line here emulates some DOS commands and some Linux commands. the goal being that it should appear familiar to those that work in either environment. But there are differences and the HELP command can be used to retrieve some limited assistance.
If the ‘jnior’ account password has been changed there is another administrator’s account that you can try. Try to login to the ‘admin’ account using the default password ‘admin’.
The Series 3 does not have a USERS command that would list the set of defined users. This has been added in the Series 4. Most customers are unaware of the ‘jnior’ account out of necessity but are not aware that there are also ‘guest’, ‘user’ and ‘admin’ accounts the latter also being an administrator.
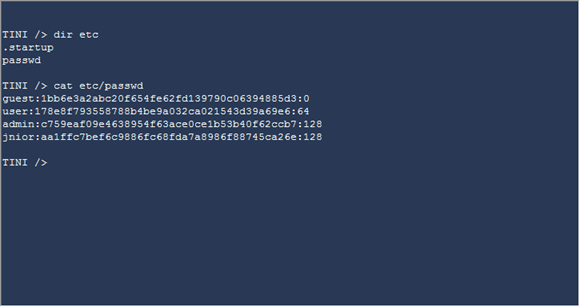
On the Series 3 you can check the available accounts by displaying the content of the etc/passwd file. There is an entry in this file for each user. The username is apparent although the password is encrypted. The trailing user ID represents the user level. A ‘128’ signifies an administrator. A ’64’ a user who does not have administrator privileges but can control the unit’s outputs. And the ‘0’ representing a guest who can monitor the JNIOR’s IO status but cannot alter anything.
It is highly likely that the prior administrator of your JNIOR was unaware of these accounts and you can gain access using the ‘admin’ account. You can then utilize the PASSWD command to reset the password for the ‘jnior’ account. Um, perhaps setting it back to the default until you place your Series 3 JNIOR in service on-line someplace.
Note that you can use the ‘rm etc/passwd’ command and delete the passwd file and reboot (use the ‘reboot’ command or pull power). The boot process will restore the default etc/passwd file and therefore all of the default accounts.
If you cannot gain access with either the ‘jnior’ or ‘admin’ accounts then a more elaborate procedure will be required. That is beyond the scope of this thread. I’ll address it in another.
So now you are connected to the serial COM port (labelled “RS-232”) and it is supposedly the “diagnostic port”. That would tend to mean that the system might just blurt diagnostic messages out of this port regardless of what you might otherwise be using it for. Well that is true. Generally these messages are only issued during boot up. And, you can disable them if you are planning on using the port to communicate with another device.
So let’s watch the boot. The Series 3 is painful in that the boot takes a minute. That is very much unlike the Series 4 which completes the boot process so fast that you have barely removed your hand from the power connector. Here’s the Series 3 boot:
By the way the POR (Power On Reset) count reported in the above video is 00000001 because the battery in that unit is DEAD. This is likely going to be the case in many Series 3 units now that the line is over a decade old. If you are handy with the soldering iron that can be fixed. See the post 310/312/314 Battery Replacement.
