Commanding the dataprobe iBoot device from the Cinema application
The iBoot device from dataprobe is a Web Enabled Power Switch. We can command the devices by issuing HTTP Requests. To do this we will add an iBoot device to the Devices file and add “Power On” and “Power Off” actions to the Macro file. We then associate the actions with macros. We might want separate macros for power on, power off and power cycle.
To create the iBoot device in the devices file go to the Devices tab in the JNIOR Support Tool. Then in the lower left click ‘Add’. Then fill out the information as follows. This device can be added to an existing devices file or a new one. We are going to use the HTTP Request device type.

Then click over to the Macro tab and click on Link Devices. This will link the devices file so that the configured devices are available to create macro actions.
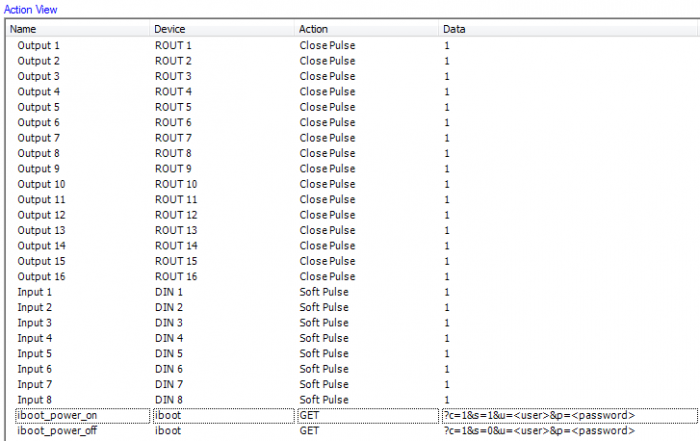
Now click ‘Add’ below the Macro Action View. You can rename the action. Click in the Device column for the new Action and scroll to the bottom to select your linked device. Select the iBoot device. Now click on Action and select “GET”. In the data field enter the resource portion of the URL””. It should look like this… Remember to enter the username and password if needed.

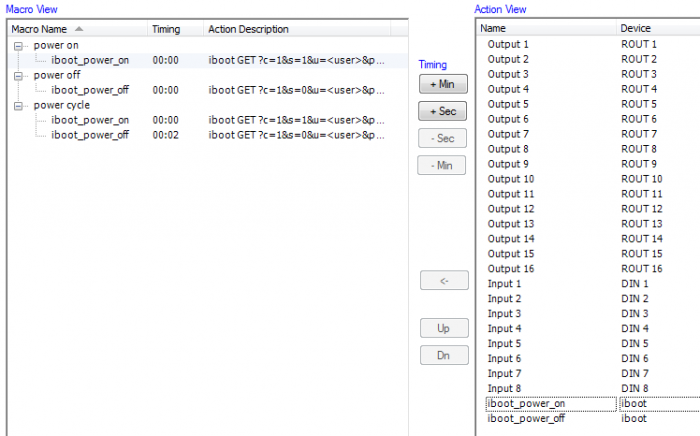
You can now add the action to any macro by selecting both the macro you wish to add it to and the new iBoot action.s Then use the <- button between the two views like this…
