Macro Files – Jnior Supporter
At the top left corner of the Supporter are menus for different features that the Supporter offers. Of these menu options exists the Cinema Menu. One of the main features of the Cinema menu is allows you to open or create Macro files. Existing macro files can be opened from your PC or a JNIOR remotely. When macro files are opened, they appear as tabs next to the Update and Snapshot Tabs. These files have much of the same functionality as when they were used in the Support Tool.
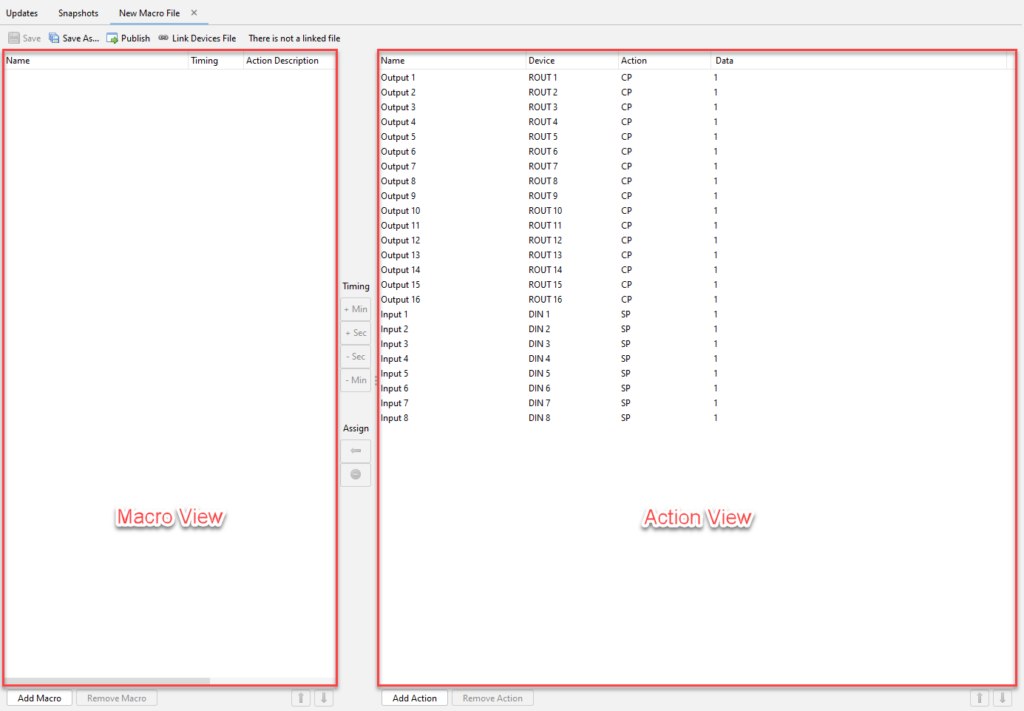
Macro files define what macros do when they are executed. This can range from turning on/off I/O values, communicating with an external device, and changing lights and sounds coming from the control panel, and more. On this page, there are two different views. One is the Macro view, where macros are created and contain the actions they perform. The other is the Action view, where actions are created and can be added to macros in the Macro view.
Creating Macros
To add a new macro, select the ‘Add Macro’ button at the bottom left of the Macro file. You’ll then see that the new macro is added to the Macro View. Clicking once on its name allows you to rename it.


Creating and Add/Removing Actions to Macros
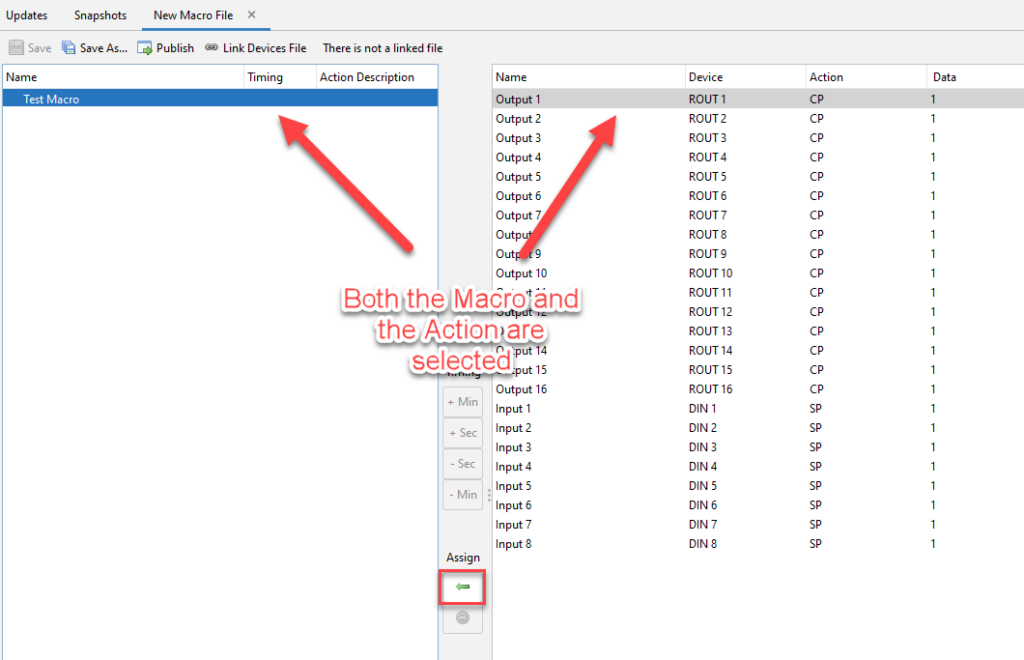
After adding the macro, you can then add actions to it. The actions are on the right side of the Macro File and you can create new actions by hitting the ‘Add Action’ button at the bottom of the action view, or edit existing ones by selecting them and editing the values in their columns. By selecting the macro and then the action you can choose the arrow button between them to add the action to the macro.
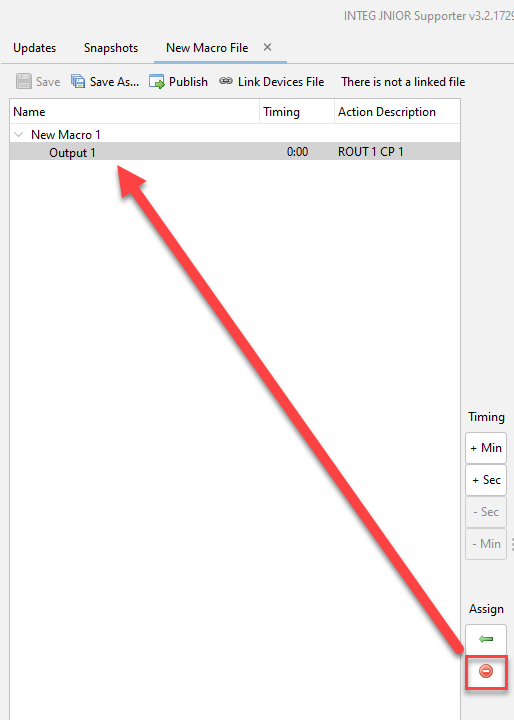
Alternatively, you can remove actions once they’ve been added to a macro. By selecting the action within the macro, you can click the minus button between the macro and action view to remove it.
Editing the Action Cue
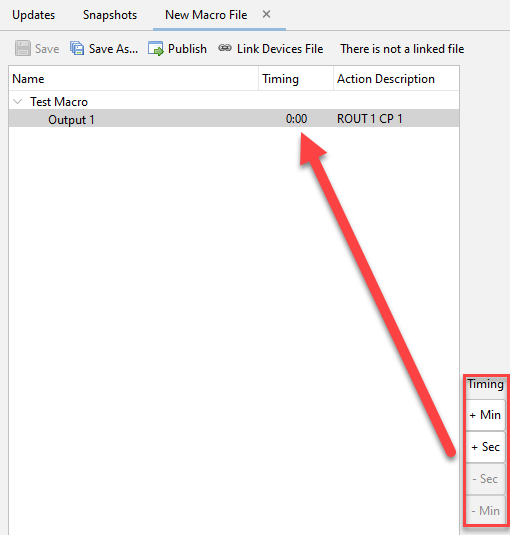
Actions can be set to trigger at different times by editing their timing. While an action is selected in a macro, you can press the various timing buttons on the right to add or reduce the time it takes to trigger that action within the macro. If an action’s timing takes longer than another action in the same macro, it shifts places in the macro so that it will execute after it.
Re-order Macros
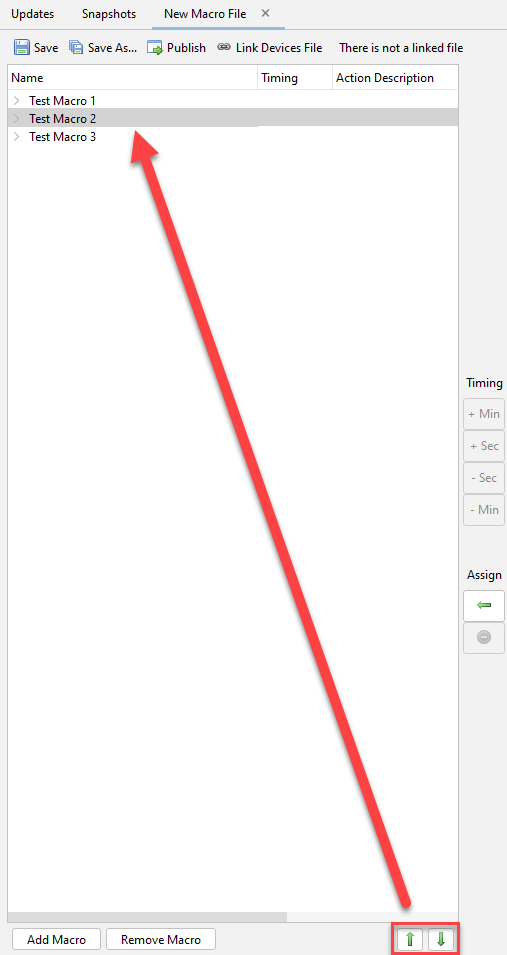
You can move your macros by shifting them up and down with the up and down arrow buttons. This doesn’t change how or when macros execute but can help you keep your macros organized.
Save and Publish
Once you finish adding your macros and actions, you must save and publish your macro file to your JNIOR by selecting the ‘publish to JNIOR’ button. This will prompt you to save your macro file. Saving macro files follows a naming rule, where the file name must start with ‘macro_’ and end in ‘.csv’. Ignoring this rule will prevent the Macro file from being saved.

After you save, you can then select your JNIOR to publish to. When clicking the publish button, you’ll be presented with a JNIOR selection dialog of all the units reporting in Beacon. You can publish to one or more JNIORs by selecting the checkbox next to them. Then hitting okay will begin publishing to those units. With that, you now have created and published your macro file to a JNIOR. Now when the JNIOR receives a command to execute a macro you created, it will go through and execute each action inside the macro in order.
Referencing Devices from your Device file in Macros
You may have external devices you want to control from a JNIOR macro. To do this you first need to create and publish a Device file to the JNIOR. Once that is done, at the top of the macro file you’ll want to select the Link Device File button. You can choose either a local device file on your PC, or a remote device file loaded on a JNIOR. Once selected, you’ll know the device file is linked because it will show that device file’s location path. Now when you choose a device in the device column of an action, you should be able to reference any device from the device file you linked!
