JNIOR IP Defaults to 0.0.0.0
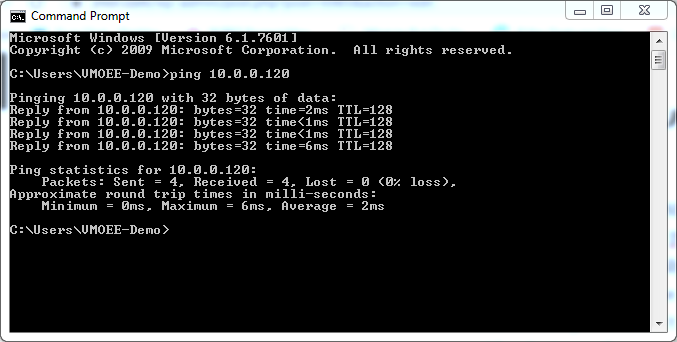
When using the JNIOR, you may want to change the IP address to fit a pre-existing schema for JNIOR’s on the network. JNIOR’s are set to use DHCP by default to get their IP address. DHCP searches a network the JNIOR is trying to connect to and finds an available IP on the network for it automatically. If the IP of the JNIOR gets set to 0.0.0.0, a separate device on the network is likely using that IP address. The JNIOR doesn’t want to interrupt pre-existing IP communication with a device on the network, so rather than take the IP and create a conflict between itself and the other device, it simply defaults its IP to 0.0.0.0. To confirm another device is on your network using the same IP, you can try pinging the IP Address that has the additional device on it. If the ping replies successfully, you’ll know you have another device somewhere on the network using that IP. To ping on Windows, open the command line and type “ping (IP address)”. NOTE: Not all devices on a network have ping capabilities.
To resolve the issue, you have to change the JNIOR or other device on the network to another IP that prevents the two devices from conflicting. You can change the IP address from the JNIOR’s command line using the ipconfig command, entering “ipconfig -a” followed by the new IP address you want to assign to the JNIOR. You can also do so from the Support Tool by right-clicking a JNIOR in the beacon tab and selecting Configure/IP Configuration, which opens a dialog box that can be used to set the IP of the JNIOR. This is where DHCP can be disabled, which can fix a 0.0.0.0 IP when DHCP can’t find an available IP address on the network, or if the network doesn’t support DCHP.