Creating Macros in the Support Tool Macro Tab
When using the Cinema application to send/receive commands to JNIOR, you may want to better customize the actions your JNIOR can perform beyond just controlling the JNIOR’s I/O. Creating macros is a great way to get more functionality from sending/receiving commands to the JNIOR. This post will explain how to create and upload macros to your JNIOR.
To create macros, you need to have the support tool downloaded, which you can get here.
| Name | Version | Release Date | Size | MD5 |
|---|---|---|---|---|
| JNIOR Support Tool | v7.18 | Jul 08 2025 | 6.2 MB |
Creating Macros
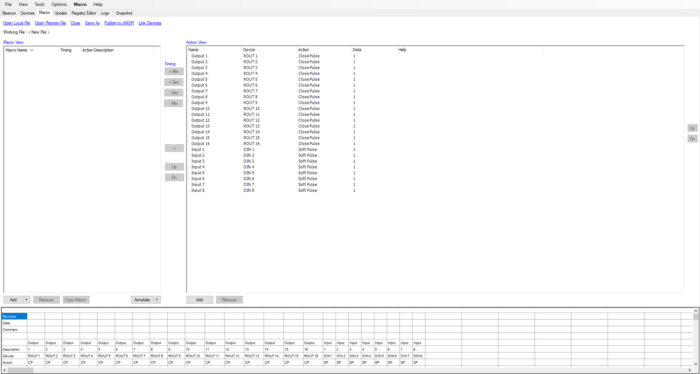
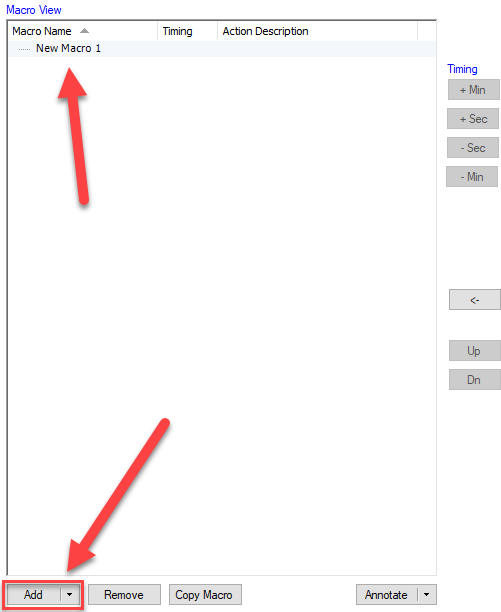
Once the support tool is downloaded, you’ll open it and go to the macro tab. In the macro tab, you can create and upload macros to your JNIOR. To add a new macro, you’ll select the ‘add’ button at the bottom left of the update tab and select ‘macro’. With the new macro added, you can click on the new macro to edit its name.
Adding Actions to Macros
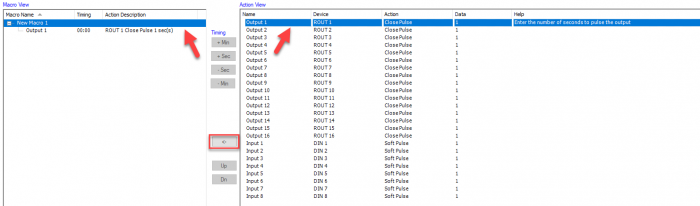
After adding and naming the macro, you can then add actions to the macro. The actions are on the right side of the update tab, and you can add new actions at the bottom of the action view or edit existing ones by selecting them and editing the values in their columns. By selecting the macro and then the action, you can select the arrow button between them to add the action to the macro.
Editing the Macro Cue
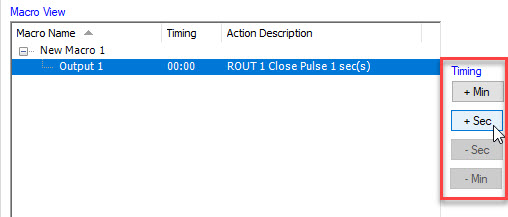
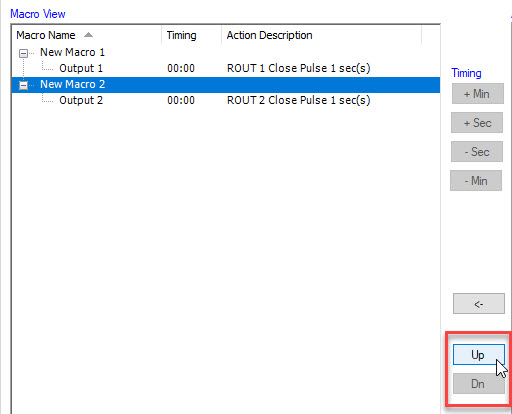
Macros can be set to trigger at different times by editing their timing. While an action is selected in a macro, you can press the various timing buttons on the right to add or reduce the time it takes to trigger that action in the macro.
You can also move your macros by shifting them up and down with the Up/Dn buttons. This doesn’t change how the macros execute, but can help you keep your macros in organized.
Once you finish adding your macros and actions, you’ll then need to save and publish your macro file to your JNIOR by selecting the ‘publish to JNIOR’ button. This will prompt you to save your macro file. After you save, you can then select your JNIOR to publish to. With that, you’ll have created and published your macro file to a JNIOR. Now, when the JNIOR receives a command to execute a macro you created, it will go through and execute each action inside the macro in order.
Opening an Existing Macro File
There are two options when opening an existing macro file: you can open a macro file that is saved locally on the current machine or a macro file that resides on a JNIOR. We call a file that is on a JNIOR a “remote” file.
The Open Local File button will open your file explorer to where Macro files are saved on your PC. Here you can select one you wish to open, and it will populate into the Support Tool Macro tab.
You can also select the Open Remote File button, which will open a JNIOR selection screen and allow you to open a Macro file that is loaded on a JNIOR.
Referencing Devices from your Device file in Macros
You may have external devices that you want to control from a JNIOR macro. To do this you first need to create and publish a Device file to the JNIOR. Once that is done, at the top of the Macro tab you’ll want to select the Link Devices button. Your file explorer will open to where your Device files are saved, and you’ll select the one you want to use. With this, you’ll now be able to reference any Device you created in the Device file as a device you can use in the Device column of your actions! If this didn’t work, here is a more detailed walkthrough of this.
Publish
Publishing a file allows you to save the file on a JNIOR. This will force you to save it locally as well. Clicking this button will open the JNIOR Selection dialog to select the JNIOR you want to use.