Serial Control Plus – A Beginners Guide
Serial Control Plus runs on the JNIOR and allows the user to interact with the JNIOR I/O via the serial port or the Ethernet port using simple ASCII commands. The user can control the relay outputs (on, off, pulse) and receive the status of the digital inputs and relay outputs (on, off) and counters via the serial port or Ethernet port.
NOTE: This application is not secure. Any device on the local network can connect to the TCP port and send ASCII commands. Security at the physical network layer will keep malicious devices off the network.
This application comes preinstalled. We always recommend staying up to date with your software. This application is part of the bundled applications update project, which you can find below.
| Name | Version | Release Date | Size | MD5 |
|---|---|---|---|---|
| Serial Control PLUS Manual | v7.0 | Oct 26 2021 | 531.5 KB | ba3eaae8bbd42190b2c5cf537e71e798 |
| Bundled Applications | v24.12.31 | Dec 31 2024 | 514.8 KB | 9c5af79fb13d762031840d9eed7db36b |
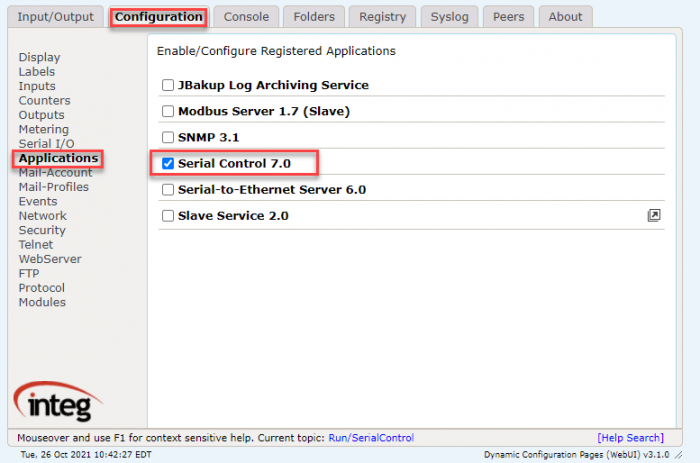
Set the application to Run when the JNIOR Boots
Serial Control Plus is one of the applications from the all-in-one update project that comes pre-installed on your JNIOR. You only need to enable the Serial Control Plus application to start on boot. In the JNIOR WebUI, in the configuration tab application section, clicking the checkbox next to Serial Control Plus will enable it to run on boot. You’ll need to restart the JNIOR for this to take effect.
Ways to Connect
A device on the network can connect to the JNIOR through Serial Control Plus by setting the TCP/UDP port or enabling serial communication for the application in the Registry Tab of the JNIOR

Example commands
These commands will allow you to control the Outputs…
C1        - Close relay output 1
O234      - Open relays 2, 3 and 4
C*        - Close all relay outputs
O+2       - Open relay 10
C1p=1000  - Pulse relay 1 closed for 1 second
To query the current status of the I/O you can use the ‘?’
din5?     - Queries the state of input 5
rout5?    - Queries the state of output 5
Configuring devices to control the JNIOR
Devices need to be configured to control the JNIOR. Every device is different and this post cannot cover any specific device. The main objective is getting the controlling device and the JNIOR to agree on the communication method. If the method chosen is serial, then make sure the serial settings, like baud rate, data bits, stop bits and parity are correct. If the chosen method was an Ethernet method like TCP or UDP then make sure the port is correct and that the JNIOR is listening on the desired port. To check that the JNIOR is listening you will want to use the netstat command.
Remember, the JNIOR needs to be rebooted after setting up the initial configuration.
Once you have defined the configuration method, you can set up what gets sent to the JNIOR. Use the command examples above to configure the correct commands. Pay attention to setting the termination string. A termination string defines what gets sent at the end of the message so that the JNIOR knows when a full message has been received. This is usually a carriage return or line feed. Again, different devices configure those characters differently. When configuring those characters in the JNIOR you would enter \r or \n. But other devices want you to enter the HEX values for them. In this case, you would probably need 0x0d or 0x0a. This is device-dependent so refer to your device’s documentation.