Manually Upgrading Cinema from a Series 3 to Series 4
There are many reasons to upgrade a series 3 JNIOR to a series 4. While we believe the experience and reliability are much better with the newer hardware and software, we understand that in most cases, the “if it isn’t broke, don’t fix it” rule applies.
When you are ready, use the following steps to help the transition go smoothly.
NOTE: There is a “Cinema Migration Tool” application that was created to simplify moving cinema configurations from Series 3 to Series 4 JNIORs. We recommend trying that application first before doing this manually.
Can I just perform a backup from the Series 3 and restore it onto the Series 4?
You can perform a backup and restore. BUT, this will copy over the cinema.jnior application. This file will not run on the Series 4. There is a specific cinema file, cinema.JAR, that will run on the series 4.
If the cinema.jnior file gets copied over there will only be one small issue. A restore will set that file to run on boot. Every time the JNIOR boots, it will throw an error regarding the cinema.jnior file being there and being in the incorrect format.
The procedure
1. Update the Series 4 Operating System
Make sure the new series 4 JNIOR’s Operating System and Cinema application are up to date. You can find those applications on the All Downloads page.
The Cinema update will ensure that the Cinema application is present and will run on the Series 4. The version of the application that is loaded on the Series 3 will NOT run on the Series 4.
2. Take a Snapshot of the series 3 JNIOR to be replaced
3. Extract the Snapshot
Open the Snapshot zip file and extract the macro file, devices file, and flash/jnior.ini file.
4. Upload the macro and device files to the destination series 4 JNIOR
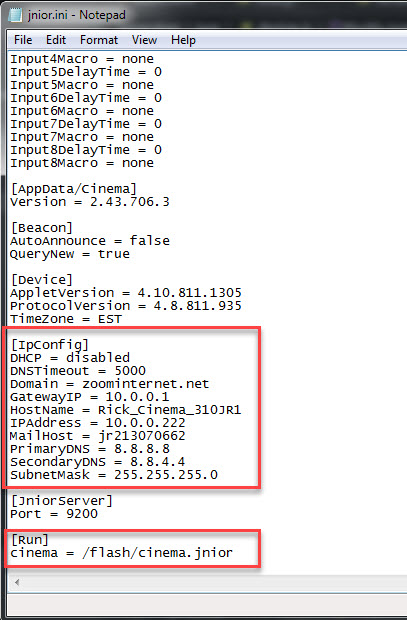
5. Edit the jnior.ini file
The configuration is stored in the flash/jnior.ini file. Before you upload it, we will need to remove two sections from the file. We will remove the [ipConfig] section so that the IP Address remains, and the [run] section so that cinema.jnior does not try to start on boot.
6. Upload the updated jnior.ini file
To upload the file you have two options. You can use your favorite FTP client or use the DCP. If you use the JNIOR Web Page, you will want to go to the Folders Tab. From there, you can drag and drop your jnior.ini file to the temp/ folder. I recommend the temp/ folder for the upload so the file gets cleaned up after a reboot.
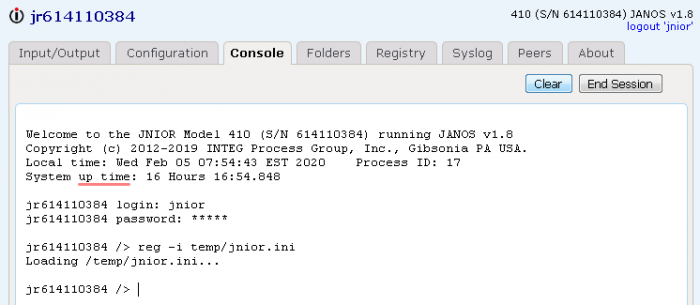
7. Ingesting the new configuration
To ingest the new configuration, we will run the reg -i command from a command-line connection. Again, you have multiple options for making the command-line connection. You can use an application like PuTTY or the Console tab in the DCP. If you use the JNIOR Web Page your command will look like this.
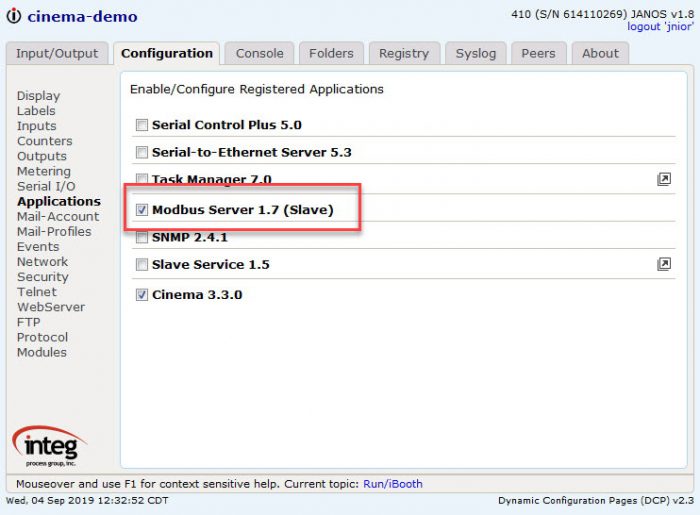
8. Enable MODBUS Server (If you are using a GDC Cinema Server)
The MODBUS server ran by default in the Series 3 operating system. It is a separate application on the Series 4 that must be enabled to provide MODBUS connectivity.
You can enable MODBUS via the DCP. http://JNIOR_IP_ADDRESS in your browser.
9. Reboot the JNIOR again.
Your new Series 4 should be running the Cinema application with the configuration and settings from your previous Series 3 JNIOR.